My husband I love adventure and our kids are growing up loving it too! So, when the opportunity came to meet my parents in Williams, Arizona, we jumped at the opportunity. We both had never been and it sounded like a lot of fun! There were definitely no regrets after this trip and it's been a year and half and my kids still talk about this as one of their favorite adventures!
This trip was quick and we knew we didn't want to rush exploring on the way there and on the way back. We ended up pulling the kids out of school for a total of 2.5 days. The first day, they went to school for half the day and then we headed out to make it to Barstow, CA in time for dinner. We saw a gorgeous sunset, ate at the local Panera, and hung out in our hotel and let the kids do their homework. The next day is when the adventure truly began! We stayed at the Best Western there, because we know that they have decent breakfasts. . . and really. . . the boys could live off of their waffles for breakfast!


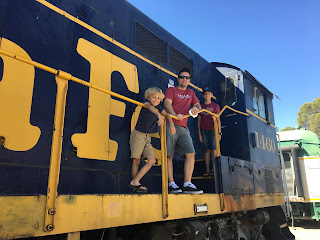
We started off our adventure by checking out the Barstow Harvey House. There are all sorts of trains to climb on, a route 66 museum (we didn't do this on this trip, but we did it when Ethan was a baby). It is a beautiful building both inside and out, well worth the extra time to check it out. We also spent some time on the second floor checking out NASA's Goldstone Deep Space Visitor's Center. The museum is completely free and full of some really neat interactive exhibits! The kids could have spent a couple of hours there learning all they could!

After, probably more time than we had planned (we didn't know about the Deep Space Exhibits), we started on the rest of our journey. It was going to be a full day of driving, with a couple of spots along the way. Our plan for the day was to drive Highway 40, but with a slight detour down part of the original Highway 66 to visit the teeny town of Oatman, and then on to our dinner and our hotel in Williams.
Our first stop was Needles, CA for lunch. We wanted to eat at as many "authentic" route 66 places as possible so, we found the
Wagon Wheel Restaurant and it was delicious! Then, because it was still quite a ways to Williams we headed on down the road.
Not far from Needles, you can take a turn off to Oatman/McConnico/Kingman. It's a bit slower, being the original 66, but there are not a whole lot of cars. But, Oatman is well worth the drive and so are the views. You can stay on the 40 and go through Yucca to Kingman and probably get there in a fourth of the time, but you won't get to see Oatman and you will regret it.


The town of Oatman is basically a street in the middle of the dessert that has wild donkeys roaming the streets. It smells. But, for a dollar you can feed them (and if you don't they will follow you like sad puppy dogs). There is also an old hotel that if you dare go up the stairs (we did. . . they are really old and wobbly), you can check out room 15, where Clark Gable and Carole Lombard stayed on their honeymoon. I am not going to lie. . . I am still wondering why on earth a famous movie star felt the need to take his new wife to Oatman for their honeymoon. We stayed for about 45 minutes, because it stunk so bad and we still needed to make it to Williams in time for dinner. In all serious, Oatman is the most authentic Route 66 town that has been kept alive by wild donkeys, unlike a lot of others that kind of died off when the 40 was built.


The quiet roads and the views were amazing! The view outside our window changed so much as we got closer to Williams. It was fun to see the colors and rock formations, as well as Joshua trees and cacti.
We made it to Williams, met up with my parents (who were coming home from their summer in Wyoming) and went to dinner. There were a lot of places to choose from to eat, but the best part was walking around at night and seeing all the neon signs lit up! Plus, after being in triple digit weather, it was actually chilly and we needed to put on a sweatshirt!
Williams, despite being a tourist-y town, is also a small town with a very successful high school football team. Some of the stores, including the local dairy queen were closed because it was homecoming and their employees (local high school students) wanted to celebrate, too! We could hear the fireworks, band, and cheering from down the street that you almost wanted to cheer for them too!
The next morning we boarded our train that would take us to the South Rim of the Grand Canyon. It was a nice way to get there and gave everyone a break from driving. Each car has a host, full of fun jokes and puns, a beautiful view out each side, and live entertainment from fiddlers to robbers and bandits!
We had several hours to hang out at the South Rim. One of the things we wanted to do was eat at the famous El Tovar Restaurant (you can even see the table that Teddy Roosevelt liked to sit at on his visits). The food was delicious and the desserts were dreamy! Then, we set off to explore!
Ethan was learning about rocks in his 4th grade science class, so we explored and even learned some new facts and Weston earned his Junior Ranger Badge. He as so excited!
We spent a lot of our time, partly because it was so hot and partly because it was so gorgeous, just looking out into the Grand Canyon. It's vastness is just so breathtaking that even the kids were speechless! We spotted chipmunks, lizards, and a lot of other fun animals lingering on the rocks and out in the canyon.
Late afternoon came and we boarded back on our train and headed back to our temporary home in Williams. We explored the streets a little bit more and tried the local brewery (delicious). One thing we really loved about Williams is that you could walk just about everywhere!
The next morning came and it was time to head back home (well, to Barstow, anyway!). We started by fueling up on caffeine at the local coffee shop (quite necessary and quite delicious!) and then headed back home. This time taking a little detour along the original route 66 from Seligman to Kingman. They way takes you through roadside stops with fun shops, and fun town names like Peach Springs and Hackberry. There's even a stop called Radiator Springs (which I am sure is just a play on the Cars movie!). There are all sorts of old cars and replicas of Cars characters, as well as vintage gas stations and old license plates! We all had so much fun that we realized we were taking too much time exploring!


We ended up eating a late lunch in Kingman at Floyd and Company, which is a BBQ place and a pizza place on Kingman (it came highly recommended by some friends of our and is owned by some of their family). This place was wonderful and the pizza side even had dairy free cheese, which made our youngest quite thrilled that he could actually partake in the food! That afternoon there was even an old car show, which was kind of fun to walk through to get to lunch!
From there we headed back to Barstow. Same hotel and as a welcome back to California, we ate at the largest In & Out that I have ever been in! The next morning, instead of eating the Best Western Food, we went to the local McDonalds because it actually inside a train. Then it was time to head home and prepare for reentry to reality. Kids were back at school the next day and Jon had to go to work. This trip was very quick, but so worth it! I highly recommend you take the trip if you get a chance!
p.s. if you wanted to make the trip even more exciting. . . stay on the 40 and end up in North Carolina!


 After, probably more time than we had planned (we didn't know about the Deep Space Exhibits), we started on the rest of our journey. It was going to be a full day of driving, with a couple of spots along the way. Our plan for the day was to drive Highway 40, but with a slight detour down part of the original Highway 66 to visit the teeny town of Oatman, and then on to our dinner and our hotel in Williams.


