Tuesday, February 27, 2018

Connection Time {February 2018}


Wowzers, this month sure did fly by.  This month brought a bit of adventure, a sick kid, and the start of the kid's bedroom makeover. So, go grab a cup of coffee or your favorite drink and let's sit down and chat.  This is a chance for us to really get to know each other and make connections, like we would if we were going out to coffee.  I think that those connections and chatting time are so important.  

We are in the middle of painting and giving the boy's bedroom a makeover and my kids are sleeping in random places.  There are no complaints on their end. . . it's all so exciting! I think I am going to do an in process post because there are so often times when we just see the finished product and not all the stuff that happens in between.

The season of Lent started and I love it like I love Advent.  The preparation of our hearts for Christ's death and resurrection are just as important as preparing our heart for His birth.  It is so much more than giving up something for 6 weeks.  We are working our way through Exodus with She Reads Truth/He Reads Truth.  The cards they created for the kids are just so neat!  The kids honestly cannot wait until we do another card, and how much they remember is my favorite.  We will definitely be using this as an excuse to watch the Prince of Egypt when we are done! 

This year, I was put in charge of Bible Memory for our Bible Study and I will have to tell you that I absolutely love it.  It's an area where I actually struggle in and am loving finding fun ways to inspire the ladies (and myself) to memorize our theme verse!  I am loving the exercise of coloring a verse.  It is not only relaxing and fun, but it also is time to pray through the verse and work on memorizing it while your hands are busy being creative. 

Here are some other little tidbits:

Outside my window  the rain that happened earlier is now drying up and the sun in peeking out from behind the clouds.  The lemons are extra pretty right now as they soak in that warm sun!  In other news, our plum tree is enjoying our spring like conditions and has started blooming.  Baby plums are on their way!

I am thinking
of how peaceful it is right now and how I had better not get too soaked into my writing time and forget to go pick up those sweet boys of mine.  Ha Ha!

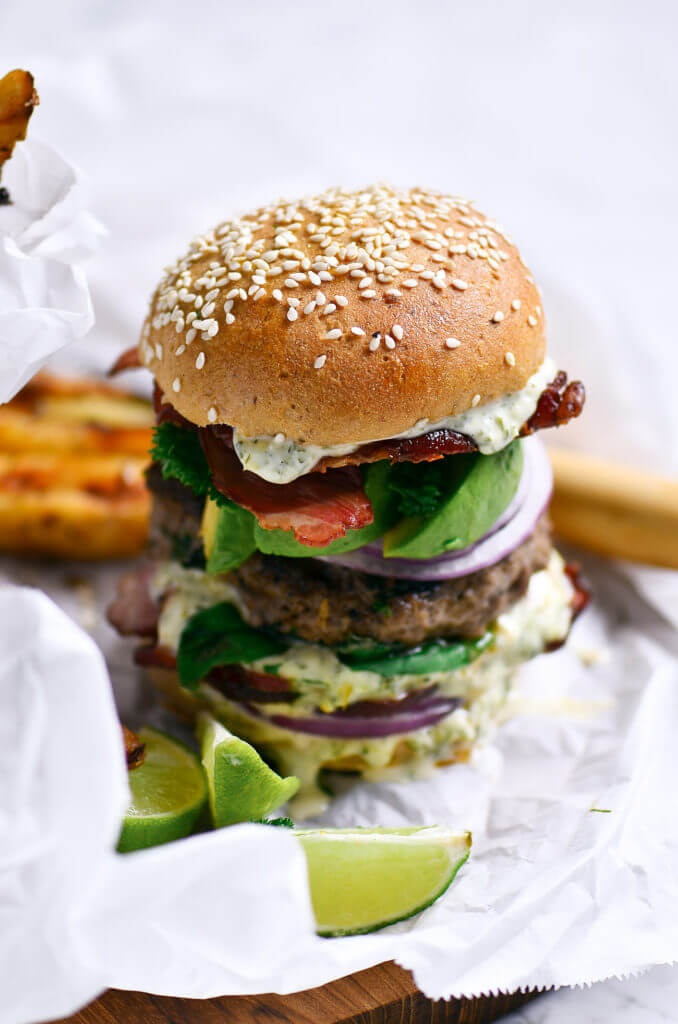
From the kitchen
I made these granola bars last night, which I haven't made in quite some time.  They were a huge hit, especially since they are dairy and soy free!  My husband brought home some meyer lemons that are screaming to be made into something as well as the 2 ripe bananas on my counter.  I only have so much flour until thursday. . . so what to make?

I am wearing yoga pants right now (i was painting), but here's one my favorite outfits right now: these cuffed jeans, striped t shirt, and a sweater.  Absolutely loving the basics right now!

I am creating a big boy room for my two boys.  They share a bedroom and there were just some changes that needed to be made in order for it to be more functional and fit the personalities of our quickly growing boys.  Stay tuned to my instagram to see the play-by-play or wait patiently for the wrap up blog post. 


I am going to coffee with a friend tonight. That sounds just so frivolous, but it is seriously one of the best things.  Time with friends is just as valuable to your soul and well being.  I am a much better person because of the people I surround myself with.

I am reading
nothing right now.  Well, I started a book by Loraine Snelling last week and haven't picked it up since.  Ha ha.  Tomorrow, I am going to start a Wrinkle in Time with Ethan (since the movie looks amazing!) and I am reading Charlotte's Web with Weston before bed.  I also have a pile of magazines to peruse through.  

I am hoping
that it rains some more this week. We haven't  had enough and they are my favorite days. period.

I am hearing
the kids do their chores.  For some reason it sounds like dinosaurs are invading.  The reality is:  I am a mom of boys!  (also, I didn't forget to pick them up. . . in case you were worried!)
 
Around the House
there is chaos.  We are in the middle of a room redo and last week and the floors are desperate for cleaning. I will be honest with you, some days are like that.  In fact, things have been a bit crazy, so when one of my kids specifically asked for a cuddle date, we dropped everything for some cuddle time.  Sometimes there are more important things than clean floors!

 
One of my favorite things 
is my bike.  I've only ridden it once, but I might be in love.  There's nothing fancy pants about it, just a hybrid cruiser from Target.  And a cup to carry my coffee, obviously.  My helmet came in the mail yesterday and now we can go on family bike rides, since everyone can officially ride a bike! 

A few plans for the week:

  : paint
  : Paint
  : finish painting
  : enjoy the rain
  : have coffee and pastries with the hubby

oh and make cupcakes.  Because, we can. 
 
What I am listening to right n
ow is the Disney Hits station on Apple Music.  It has been my painting music because I can blare it full blast. . . and sing along, because nobody's home!  (Please tell me I'm not the only one who does this?)  I've also been listening to Dianne Michelle.  Dianne did the worship at the Aspire conference that was held at our church last weekend.  She has a beautiful voice and is was paired quite wonderfully with the laughter of Anita Renfroe! 


 Now, it's your turn!  Grab your coffee and let's connect! You don't have to do them all! I can't wait to hear from you! You can even private message me if you don't want to make it public.  

Outside my window
I am thinking
From the kitchen
I am wearing
I am creating
I am going
I am reading
I am hoping
I am hearing
Around the House
One of my favorite things
A few plans for the week
What I am listening to 

Friday, February 23, 2018

King Arthur Bake-A-Long: Classic Challah

 I have had the hardest time sitting down to write this week.  Well, actually getting anything done.  It's been crazy and fun and we are finishing up our third 4 day week in a row.    February brings three 3-day weekends every year and each year it shows up and I'm quickly reminded on how much I both love and hate them.  I love them because I get my boys home for 3 whole extra days in February and we veg and have fun.  I hate them because it means 3 Tuesday-Mondays and throws the whole week out of wack.  If you are a mom of school aged kids, you probably know what I'm talking about.  For some reason these days are worse than normal.  It could be my imagination, though. So let's talk about something that makes me happy. . . bread. 

It's probably no surprise to you, that I am a big fan of bread making.  I will confess though, that the idea of baking Challah was a little intimidating.  It's just so pretty!  I can totally braid hair, but bread?   I baked up this bread twice before I got it ready for posting.  The first time, it came out wonderful, but when I was adding yeast, I realized that I didn't have the full amount (less than half, actually) and I had already had all the other ingredients in and so I just went with it.  Oops!  It came out wonderful, but I wanted to try it out again with the full amount of yeast to see what would happen.

I'm glad that I did because the yeast, made a little bit of difference in rise between loaf one and two, but other than that, it didn't really change anything about the taste and flavor of the loaves. 

The first loaf, I made trying out the 6 strand braid.  I struggled with that one.  There are so many video tutorials and I kind of just felt lost about half way through.  It still came out gorgeous and delicious (even with out all the yeast!).  The second loaf, I just did the basic 3 strand braid and that was easy and only took a few seconds!  Maybe I will just bake Challah every week so I can get some braiding in. . . ha ha! 

This bread was amazing!  We all found ourselves snacking on the loaf as soon as it cooled enough to touch and managed to save enough to make some french toast with it.  Sweet Readers, can I tell you a little secret?  

THIS bread makes the best french toast.  Period.

My kids are obsessed.  They just finished up the last of what I froze from the last loaf this morning.  In fact, when I pulled out some French Toast I had made with some leftover dinner rolls, my oldest (who has been suffering from some tween angst this week) made it very clear that that was not good enough.  Oh, man, I feel bad for his future wife.  We've got a little foodie growing up under our roof! Ha Ha!

Anyway, I wanted to get this recipe to you all because it is definitely worth your time this weekend.  Make this.  Slice it.  Snack a little.  And then make French Toast. For Dinner.  Because you should also sleep in and enjoy your weekend.  Really.  Make it first thing in the morning, then get ready for your day, while it rises.  After lunch, roll it out and bake!  Bam.  Super easy. 


 Classic Challah 
(King Arthur Flour Bake Along: January 2018)

Ingredients:
1/2 cup warm water
6 Tbsp vegetable oil
1/4 cup honey
2 large eggs
4 cups all-purpose flour
1 1/2 tsp salt
1 Tbsp yeast*

 Directions:
Measure out your flour by scooping and leveling.  Don't let it be overflowing.  
 Mix the ingredients in your mixer, using the dough hook.  The dough will be kind of rough looking.  Keep kneading in your mixer until it turns nice and soft.  Grease a bowl, and place the dough in it.  Cover and let it rise for about 2 hours.  It will get puffy, but not double in size.

Decide on how you will braid the bread.  The bake along blog shows how to do the 6 strand, plus there are a ton of tutorials on you tube for making a Challah braid.  Find the one that works for you.

Divide your your dough in to the amount of strands you want.  I recommend weighing your dough on a food scale so you have equal dough strands.  Shape each of your pieces into a log.  Cover those babies up and let it rest for about 10 minutes.  Roll each piece into long, skinny ropes.  I found that when they seemed to stop getting longer, I let it rest for a few minutes and then continued to roll them.  There's something scientific about letting the gluten relax. . . I dunno, but it works.

Attatch your strands at the top and follow the tutorial of your choice, depending on your braid.  The King Arthur Flour Blog tutorial is great!  The three strand braid is just like you would braid a little girls hair.  Easy Peasy.

Place your loaf on a your baking sheet lined with parchment paper.  Let it rise for another 2 hours.  Preheat your oven to 375 and brush your bread gently with an egg wash (whisk an egg and a splash of water together).  Bake for 20 minutes.  Check to see if it is a deep golden brown.  If it is, place a tented piece of foil over the top.  If not bake for 10 more minutes and then tent.  Once you've tented it, bake for 10 to 15 more minutes.

Let it cool. . . if you can.  Just make sure you don't burn your fingers.  This bread is wonderful!


*original used instant yeast, I used active dry yeast.

Friday, February 16, 2018

Weston is 7! {A Lego Party!}

  Happy Friday everyone!  This week has been filled with a fun adventure and a sick kid.  I even sent my sick kid to school thinking it was allergies and he ended up having a fever when he got home.  One of those OOPS mom moments!  In the meantime, he's on the mend and enjoying some tv time and staying home sick. 

Needless to say, when you have a sick kid, plans don't always go as planned, so I thought I would sit here and finish this blog post I started earlier in the week.  Weston turned 7 on the first and planning his parties is always so hard so soon after Christmas.  This year, when the kids decided they didn't want our Crayon Lego Valentines, I knew we had to use up our old crayon stash somehow and so I thought about using them for favors for a Lego themed party.  Let's just say the idea was well received!  
Weston is a serious Lego fanatic and can sit in solitude in his room and build intricate creations with our Lego collection.  Those things are his favorite thing and right now never get old. So, it made perfect sense to have that as the theme.  

This year, we kept things a little bit simpler and hosted the party for family and a few friends.  Small and sweet with plenty of activities and games to keep the kids busy.  We had a few snacks, including some delicious popcorn from a local popcorn company.  For the most part, I kept things super simple. 

I also wanted to have lots of options for keeping kids busy. . .you know, kind of limit the chaos. Probably wishful thinking, but everyone had a blast. 
Lego Fun: Lego themed activity sheets were printed from here

Create a Lego Mini Figure: I traced yellow mini figures on yellow cardstock and cut them out.  There were pencils, markers, googly eyes, and foam shapes and letters to create a mini figure.  THese kids were so creative!  Weston made a Captain Underpants (thanks Netflix for making that movie available all.the.time!) minifigure. 

Paint a mini figure: I used the same ice cube mold I had used to make the crayons (I got it at the Lego Store a few years ago) and poured plaster of Paris in the molds.  It didn't take long and it was a huge hit!  I bought some little crayola paint containers and some cheap Michael's brushes (I wanted fine point brushes because the mini figures were so small).  This was probably the most popular activity!
Build:  I went through our stash and found some plates and some classic colored bricks along with some windows and doors and made a station on our coffee table.  Since most of the party took place outside and I really didn't legos outside, this ended up being the activity that got played with when they tired and hot (I know. . . first weekend in February. . . in California. . . we're weird!).  It was a great calm down activity.

I also had planned a race a lego car station, but that never happened.  Partly because I couldn't find anything to be my track.  Bummer, but I don't think we would have had time!


We also had a Guess How many Legos Jar.  I had a small box of Legos stashed away for the prize!  They had fun doing this!  We announced the winner just before letting Weston go crazy and open presents. 

I also bought some cheap "fake" lego-like bricks from the party section at Target and we had a spoon relay race with them and then they got to play with those bricks outside.  This was fun for all the kids.  It was fun watching them figure out, as a team, the best and quickest way to get the lego pieces over to the other side.
Then, we played Tape the Lego head to the mini figure.  This was a ton of fun watching them feel their way to the right spot. 

And, as with all birthdays, the best part of the party is the cupcakes.  My sweet friend Stephanie took some great shots and I am so in love with this one!  Weston's face is just full of joy from the fun day and his brother is totally trying to blow out his brother's candle.  Kudos to my hubby for stopping Ethan not drop the cake! 
And finally, The party favors.  I cooked up some crayons in the shape of bricks and mini figures and threw them in snack sized sandwich bags.  I am loving how they came out!

And that's Weston's party.  A HUGE thank you to my BFF Stephanie for capturing the day with her camera!  It was so nice to not have to worry about taking pictures so I could be fully present at my son's birthday!

Have a great weekend!


Monday, February 12, 2018

Glow Stick Valentines {Free Printable}

 The kids have today off and it is just this beautiful overcast day and all we want to do is hide inside and be lazy.   I am 100 percent okay with that.  Every now and then it's just kind of fun to take a break and watch tv all day and lay around in your pajamas.  We do, however, need to work on addressing Valentines for both kids to pass out on Wednesday, but that's kind of fun.

I know that Pinterest is full of wonderful ideas for Valentines, and we always opt for non candy treats.  I'm not exactly sure when Valentines switched to being treat plus card, but it does make it fun and teaches our kids to be generous and thoughtful and I am okay with that.  I'm not really okay with all the candy that makes its way into our house and I kind of feel bad that the majority of it goes in the trash (I am totally that mom!).  But, I know that my kids jump on the crazy train with too much dyes and so we avoid a lot of those candy.  Weston also has a food allergy, so really most chocolates (even the darks) that you buy at Target have milk in them and most of the candy has soy (even dum dums).  Thankfully, we always keep a stash of friendly candy so they don't seem to care. 

The past few years, we have made crayons using fun silicone ice cube trays with our old crayons and it has been so much fun!  We don't spend tons of money on them and they always are a hit.  I was full on ready to start making crayons when the kids ganged up on me and said NO MORE CRAYONS.  I was kind of sad because how else was I going to get rid of our stash? (I solved that problem very quick!).  You can find those printables on this page and the tutorial here.

This year, we decided to use glow sticks, because they are so much fun without all the sugar.  I spent some time searching for all the different sayings that could be used for glow sticks (Pinterest has some really great ideas floating around), and then designed my own with the idea I had going on up in that brain of mine. 

Here's how to make them.  Click on the link below and print them out on card stock and in color.  I ordered them on Office Depot's website and picked them up the next day.  Their copies always turn out super pretty!  It also doesn't waste my ink and I had to print them for two classes.  Then, I cut them out and whole punched them using a regular sized punch. I did this while finishing up the IF:Gathering streaming.  If you have bigger kids. . . totally put them to work!  The kids wrote the to and froms on the back and I put the glow sticks in because I didn't want them to break before they made it into their friends collection.  Super easy.  It also ended up costing about $10 all together for two classes.  Not too shabby, I think! 
 Also, I feel should say this:  Please use these for your own personal use.  

Post your finished product on instagram or Facebook and tag me @jolieklassen or use the hashtag #outoftherightbrainblog. . . I love to see what you all come up with! 

Happy Valentine's Day!  

Wednesday, February 07, 2018

What's for Dinner {January 2018 edition}

It's that time of the month, where we need to talk about dinners.  School has been back for about a month and we have returned to our regular, non vacation routine around here.  So, let's get serious.  We need to eat and fixing dinners is kind of a thing.  Those people that depend on us are so much happier when we feed them. . . anyone with me?  We can't eat out every night. . . and trust me (we've been eating out a lot lately and I am sooo over it!). 

Also, I feel like I should talk about how our family deals with food.  We believe in balance and moderation, because have you seen how many chocolate chip cookie recipes are on my blog?  We do also have some dairy allergies and a soy allergy (it's in everything!!!), so we are super careful on ingredients and cook as much real food as possible.  So, you will find us eating salads, some whole 30 and paleo recipes, as well as carb filled dinners.  I'm also pretty realistic in the fact, I can't do it all!  So, some nights, we break open a bag of Trader Joe's orange chicken, some of their microwave steamed rice, heat up chicken nuggets for the kids and call it a night.  No judgment here.  

 So, here a few of the recipes that I tried in January that I will definitely be making again in the future.  I look back and January was kind of a blur.  We did Disney one week and party prep for two separate parties happened, so I did a lot of easy, go -to dinners  Also, don't forget to scroll down to the bottom for the links.

1.  Bacon Garlic Avocado Burger
This recipe was quite possible our new family favorite.  I am still thinking about it and I think we will have it for dinner again VERY soon!  This was super adaptable for everyone's likes and dislikes, so Jon (who is not of fan of mayo based things and avocados), was able to eat it without those things and still completely love them.  Ethan even devoured it, so completely kid friendly!  We went bunless and served with a side of sweet potato fries and no one went away hungry.  Honestly, if you really want to try something new. . . try this recipe!  They are amazing!

2.  Lemon Chicken
I've made this one a few times and it was time for it to make another appearance, because my lemon tree has gone a bit insane this year!  I like to substitute coconut aminos for the soy sauce just in case Weston works up some bravery to try it (he's not a huge fan of chicken), and you really can't tell a difference!  It's a bit time consuming, but definitley worth it!  I always forget that I need to start dinner a bit earlier with this recipe or Damn Delicious' orange chicken (another amazing recipe!). 

If you have never made Chinese food yourself, I encourage you to try it.  There are some amazing recipes like this one on Pinterest that will give you that eating out feel without leaving the house! 

3.  Asian Salmon in foil
This was one of those recipes that I decided on very last minute with what we had in the fridge/freezer.  It was easy, I roasted some veggies at the same time in the same oven (cause we only have one) and it was another recipe that my oldest gobbled up.  Apparently he loves salmon now!  In fact, I picked up some salmon on my last Trader Joe's run and he got so excited that I was going to make this again.  I just love that he's turning into a foodie!  But, back to this recipe, I have never been disappointed with recipes from this blog.  So, when if I am undecided on what to do, I go with her recipes because they are just amazing! 

4.  Tomato Basil Bisque with Italian Meatballs
When I saw this recipe on Pinterest, I got so excited because I used to love a good tomato soup, but the majority of the recipes are filled with that wonderful ingredient, heavy whipping cream.  Super sad face, but then there was this recipe.  It was so wonderful and did not taste coconut-y at all and had wonderful texture!  The meatballs with amazing mixed in with the soup, too!  The hubby wasn't as big of a fan of this (it was just all right), but I loved it!  If you are looking for a delicious dairy free or if you are in the midst of doing a whole 30. . . check this one out!  It's wonderful!

Have you made anything that you think we should try?  Link me up to your favorite recipe from last month in the comments!  Let's inspire each other!


1 / 2 / 3 / 4

Friday, February 02, 2018

Dorothy's Kitchen Makeover

I am so excited to introduce you to my sweet friend Dorothy.  Dorothy and I go way back to our college days, where we rented an apartment together! She now is a mom of 4 and last year, she started her own blog.  She recently gave her kitchen a makeover and I'm so excited she agreed to share it with us over here. 

It’s been just over a year since our kitchen remodel and I’ve never written about the journey getting there!! When my sweet friend Jolie asked me to write a guest post about it, I was thrilled!!!  When we first bought our home, I loved EVERY part of it...except for the lovely iron banisters separating the living room from the entryway and family room. I don't think I even have before pictures 'cause they came down as soon as those keys were in our hands. Anyway…back to the kitchen…
The kitchen was spilling over with cabinets and drawers!!! I was in heaven! The only downside was the cabinets directly over the peninsula…they hung SO low that you ended up with a neck cramp leaning over to see the person on the other side. Solving this predicament inspired our kitchen redo and sent us singing a little ditty or two 🎝🎝"do your cabinets hang low, do they wobble to and fro..."🎜🎜 JUST KIDDING. 
Painting the Cabinets:
Often times I start a DIY project without warning because sometimes you just never know when you’re going to miraculously have the energy to tackle one. So, on one particularly hot August day, I decided to paint the upper cabinets white. I had paint left over from another project and away I went. BIG mistake. AND here’s two reasons why…
  1. The paint was LOW quality. If you’re going to be painting an important piece like cabinets you’re going to be using daily, you want high quality paint. Luckily, I started painting a portion of the cabinets that sit above our buffet counter and are separate from the others. So, I solved the problem by finishing the main cabinets with quality paint. The paint I used is from OSH:
  2. I started with a LOW quality paintbrush. If you want a smooth finish (which I did), you will want to use a small smooth foam rolling brush. This will leave you a smooth finish without any sign of brush strokes. If you want brush stokes, then still choose a soft quality brush. Worth EVERY penny.  So, for the rest of my project I used this foam roller pictured below. AND, if you come over for a visit, don’t look too closely at the first three cabinets I painted. Eventually, I’ll be repainting them.
A list of ideas from my experience painting cabinets:
  1. If you’re using traditional paint (not chalk paint) you will need to sand each piece A LOT. You want to ensure you’ll have good wood for the paint to adhere to. You don’t want peeling and chipping paint after all your hard work. The extra sanding will be worth it.
  2. BEFORE removing any cabinet doors or hinges LABEL (do this for staining cabinets too). Label each cabinet so you know where you pulled it from. Label each hinge so you know where to attach it to. Our cabinets are original to this 1969 house so they’ve been hanging in the same spot for almost 50 years. Trying to make them fit in a different spot might cause problems.
  3. Plan on applying at least two coats. I painted 2-3 cabinet doors at a time. I didn’t have a huge space to store them while they dried. So, it was a slow (but well worth it) process. I needed to move slowly anyway because I was limited to naptime every day.
  4. Paint the back of the cabinets first. This means the fronts are painted last and will not be facing down as you paint the back side. You wouldn’t want to damage the cabinet side that faces out.
Cabinet Coming Down:
One goal in the kitchen was to lighten the space. There is a window but the space outside is covered. So, very little light comes into the kitchen. We fixed that a little bit by painting the upper cabinets white but more needed to happen. That HUGE cabinet blocking the light from our sliding door needed to come down.
Removing this piece took longer than we thought. Each section contained over 6 plus nails driven into the wood. In order to loosen their grip, we had to chisel away at the wood around the head of the nail…over 20 to be exact. The nails still wouldn’t come out. So, we had to cut most of them with heavy duty wire cutters. Once, the last nails were demolished, my husband and I enlisted the help of our 125 pound 9 year old and we pulled that baby down! After the removal, we had to fill in holes and paint over the exposed sheet rock. AND the light we wanted was accomplished!!!
Staining the Cabinets
 
After thinking about our options for the lower cabinets, we decided on a darker color. Kids plus white cabinets didn’t seem to match well to me. My husband and I like the “real” wood look and decided on staining the cabinets a darker color.
There are other options out there for “staining” your cabinets with (supposedly) less work BUT I decided to go the traditional route of sanding and staining.
A list of ideas from my experience staining cabinets:
  1. Invest in a good handheld sanding tool. I would recommend a manual tool. When I used our electric sander it was hard to control the strength and direction of the sanding. To avoid gouges or movements that push against the grain, I would manually sand. You want the movements to go with the grain. Once, you stain, all your mistakes will be highlighted even more (trust me, I know).
  2. Sand and then sand some more. You want to make sure the stain has something to adhere to. If it doesn’t, it will bead up when you apply your clear coat.
  3. When going to the store for more stain, ALWAYS bring your empty container with you. I didn’t and ended up with the wrong stain.
  4. Start collecting old lint free socks for staining and plastic ziplock bags. You can slide the bag over your hand and the sock goes over that. No stain on your hand and then you have a bag to throw your sock away in when you’re done!
  5. Let the stain cure for the FULL recommended time. This will allow the clear coat to adhere correctly.
  6. I used spray-on clear polyurethane for the first clear coat over the stain. I then followed up with a foam roller and clear coat to ensure full coverage. You want those babies protected!!! I used:
  7. You can use a lacquer thinner if you make a mistake but don’t use too much or it’ll start eating away at the wood.
Taking care of the cabinets
  1. Keep the name of the paint and stain on hand for touch ups.
  2. I keep a small container of paint in the kitchen to quickly cover nicks or scratches. Letting those sit too long will only cause them to chip away more.
  3. Because we chose a dark stain on light wood, the stain does start wearing on the pieces that are used often. I keep a wood finish pen in a matching stain close by!
  4. The lower cabinets will remain dark while the kiddos are little but I’m seeing grey in our near future. I love the two-toned look we have right now and would like to keep it that way.
Counters, Backsplash, Sink and Stovetop
 This was probably the funnest (that’s I word, right?) part of the project cause we only did the backsplash and chose Home Depot for the counter, sink and stove install. After pricing out another private company in town, Home Depot was by far better in price. And here we are a year after install and I’m still thrilled with the work they did.
Counters
 For counters we wanted to stick with our “lightening” the kitchen goal and choose a white with splashes of grey. I loved the look of Carrara Marble but not the price or the upkeep. Siltstone Quartz in Snowy Ibiza was a great look-a-like alternative!

Sink
For the sink, I wanted BIG and single basin. We looked into an apron front sink and the pricing went up significantly for install due to the carpentry needed on the cabinet.. SO, we went with an under mount Kohler Riverby Single Basin Sink. LOVE IT!!! The white gets dirty quickly but Bar Keepers Friend is AMAZING in keeping that sparkle! For the faucet, I loved the idea of a traditional farmhouse bridge style faucet (bridge means that the levers and faucet itself all branch off one part). But then you have all these parts to clean. NO THANKS. I already have enough to clean. So, we chose Delta Cassidy in stainless. It’s simple to clean and still has a little country charm.
Backsplash
Our house was built in 1969 and we wanted the kitchen to look like it was part of the original design. So, after bringing home SEVERAL samples, we finally decided on a thin-brick backsplash to match the fireplace in the adjacent room. We purchased this at Home Depot: Thin Brick Web in Castle. To cut down on cost, my husband and good friend put these babies up!!! They come in sheets of 12 (thin) bricks stuck together.
Last minute advice:
  1. Slow and steady!!! Haste makes waste! From start to finish the cabinets took me three months. The full project took 6 months!
  2. Stand back and be proud of your work! Even the mistakes show you tried and completed a really hard task.
Thanks for reading this VERY LONG post on our kitchen renovation. My hope is that you would be satisfied in the home and space the Lord has given you. We can create beautiful homes simply through the attitude and hospitality we carry when people enter our space. May you be encouraged in dreaming big and loving your family and guests well!!! 
 Also, If you are curious about the hand lettered cutting board, you can find them here
And the paint color on the cabinets is Benjamin Moor White Snow
Clearcoat is polyclearic clear semi gloss

Dorothy spends a majority of her time putting a Masters in Early Childhood to good use at home with 4 kids. She documents the joys of childhood to inspire the fun in parenting. Outside of motherhood, you will find her spending time with her husband of 15 years, gardening, creating diy projects or spending time encouraging a friend. You can find her her blog here and her instagram here.


LinkWithin

Related Posts Plugin for WordPress, Blogger...