Friday, December 19, 2014

A Christmas Treat for you {Free printable!}

I'm sitting here enjoying a beautiful overcast sky (praying for rain) and drinking a gingerbread latte (I'm going to miss them!).  I survived another trip to Target (we go there often) and am now soaking in a quiet morning.  I just know that once 1:30 rolls around there is going to be some CRAZY going on.  Ethan was so excited to get to wear his PJ's to school!  Easiest morning of getting ready.ever!  Can they make Pajamas part of the normal dress code?   In fact, I am preparing for 3 weeks of CRAZY!  But, I am prepared!  The Kinetic sand will make an appearance, some new playdough is in the works (thank you Pinterest!), and crafts are getting organized.  We will survive!!!  
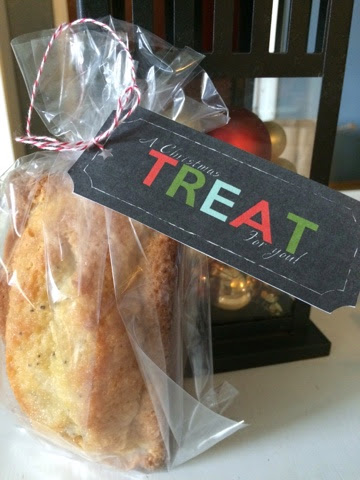
This past fall, I have had the most wonderful opportunity to co-lead a table of amazing women though the study of Gideon.  My co-leader has been wonderful and I can't wait to start a new Beth Moore study in January.  Last week, we wrapped up Gideon with a festive table and treats and some really fun games.  I made all the ladies some of this yummy bread and created a fun treat tag go along with it.  This bread is one of my favorite go-to recipes!  I just can't get enough of it!  I even gave some to Ethan's teacher, who also loved it (although, I think she had to keep it away from her son!).  

Mini loaves are awesome, because you can make  one batch of quick bread and get several loaves of bread, depending on the size of your loaf pan.  Several years ago, I was gifted these by my in-laws and seriously they are THE BEST!  I will worn you, William-Sonoma's goldtouch pans are awesome.  I am thinking about putting the cookie sheets on my wishlist.  America's Test Kitchen gives them their highest rating!  I can usually get about 6 mini loaves with this recipe! 

You should make this.  Tonight.  And then give them to your neighbors and friends in the morning.  It'll be fun.  I promise!  


Go here to get the printable.  


Orange Glazed Poppy Seed Bread
Ingredients:
3 cups flour
2 1/2 cups sugar
1 1/2 tsp salt
1 1/2 tsp baking powder
3 eggs
1 1/2 cups milk
1 1/8 cup vegetable oil
2 tsp poppy seeds
1 1/2 tsp vanilla extract
1 1/2 tsp almond extract
1 1/2 tsp imitation butter flavor*

Glaze:
1/4 cup orange juice
3/4 cup sugar
1/2 tsp each of vanilla, almond, and butter flavorings

Directions:
Preheat oven to 350 degrees. 

Spray your mini pans with Pam. 
Mix together all the ingredients.  Beat for 2 minutes.  
Pour batter into bread pans and bake for 55 minutes (may be less time depending on the size of your pans.  I would set it for 30 and work your way up).

While bread is baking, make the glaze.  Whisk all the ingredients together and set aside.  Glaze evenly over the hot bread  and allow to cool before removing.  The glaze will get hard and add such a wonderful flavor to the bread.

*I found imitation butter flavoring at Michael's in the cake decorating section.  Mine is by Wilton.  


Thursday, December 11, 2014

Chocolate Chip Muffin time!

Right now, I am sitting in bed watching Gilmore Girls (thank you, Netflix!) and writing this post.  I've been waiting all day for some rain.  I got some beautiful clouds and saw some amazing pictures of the craziness to the North of us.  Our rain is starting and I should probably go to bed at some point, but right now. . . it's me, you, and the Gilmore Girls sitting down to a nice warm latte and girl talk (sorry, if you are a guy reading this).  We will also eat these scrumptious muffins, because really, they are amazing. . .and food goes really well with latte's and conversation.  

I've made these muffins several times and they are always a huge hit!  Although, I am pretty sure that anytime I feed the kids chocolate for breakfast, I get the Mom of the Year award.  I think that it's all about the sprinkling of sugar sprinkles on top of any muffin makes them better. . . I'm sure that I'm not the only one?   


Chocolate Chip Muffins
Recipe adapted from Sally's Baking Addiction

Ingredients:
3 cups flour
4 tsp baking powder
1/2 tsp salt
1 tsp ground cinnamon
1/4 tsp ground nutmeg
2 eggs
1 cup sugar
1 cup milk
1/2 cup vegetable oil
1 tsp vanilla (I always just eyeball it)
1 cup mini dark chocolate chips

Directions:
Preheat oven to 425 degrees F.  Line your muffin tin with your favorite liners.  (Right now I am really digging these liners).  

Mix together eggs, sugar, oil, and vanilla.  Carefully fold in the dry ingredients.  Be careful not to overmix the batter (a big no-no for muffin making).  Fold in the chocolate chips.  

I like to use a cookie scoop to scoop the batter into the muffin liners.  Fill almost all the way to the top and sprinkle with sprinkles (so that sounded repetitive!).  Bake at 425 for 5 minutes and then lower the temp to 375 and bake for 25 minutes.  I always forget to raise the temp for the second round of muffins, and they seem to bake very nicely at 375 for the whole time.  


Monday, December 01, 2014

The first day of Advent & Truth in the Tinsel tips

Today was the first day of Advent!  It's my favorite time of the year.  We are once again participating in Truth in the Tinsel.  This is year 4 for us and we aren't sick of it yet!  In fact, Ethan was begging all afternoon to do the first ornament.  I love that's he's excited about this!

If you haven't hear of it this program, it's a very inexpensive E-book with a short devotional and a cute ornament to make.  It is incredibly flexible and you can make it fit around your family's needs.  I highly recommend spending the extra four dollars and getting the printable ornaments because even if you don't have time to actually do the craft, you can hand your kids the crayons and talk about it while they color.

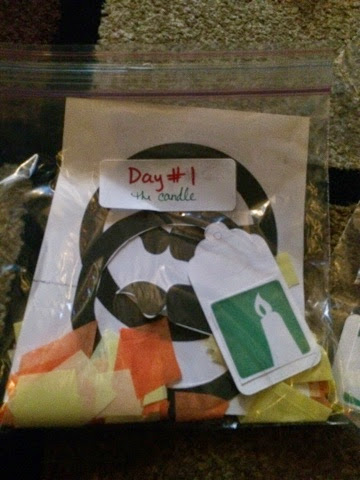
Last year, I worked really hard putting together sandwich bags with the clue and the supplies already ready for the craft.  It made it so much easier this year (once I found them, of course!).

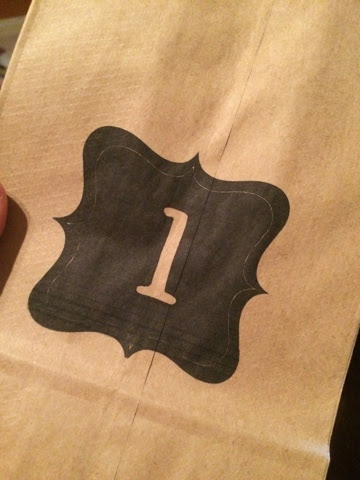
I also went with the paper lunch bags again this year.  Last year, I did this. But this year, I decided to go simpler. I printed out numbers on them.  Once, I figured it out, it went really quick. I really like the simplicity of it.  I might even be able to keep the bags for next year.  We will see.
Then, I used the basket that normally holds our library books and filled with with our advent bags.  Super easy!

Then, we got to work and had fun learning about how Jesus is the Light of the World.  Weston is really into pirates and now makes a pirate face instead of smiling.  (ahh, the life of an imaginative almost 4 year old!).
and hung them on the tree.  I can't wait to get more ornaments up on the tree!

Here are my tips:
1.  Plan for the whole month, but don't stress if you miss a few.  Christmas is busy and you don't want to stress and not have fun.  You can always go and do two on a quiet day, if you want.  It made it so easy to get everything ready because some of my bags were still full.  
2.  Get everything ready ahead of time.  You are more likely to do it if it's all ready for you.  
3.  Don't stress if you don't want to make it exactly how it's written.  People have been doing this for 4 years now and there are a lot of ideas out there for the ornaments to change it up or make it easier.  For example, the day, the sheep yard ornament, we are making hand print sheep with cotton balls and black paint.  Super Easy!  
5.  Take advantage of Instagram and hashtag #truthinthetinsel.  It's a ton of fun to click the hashtag and see what everyone else is doing .
6.  Don't think your kid is too young.  I've been doing this with Ethan since he was 3 and Weston started when he was 2 (but he's been around for it all!).  
7.  Have fun.  Buy the extra ornaments. . . So easy!  We do a little of both, but don't feel guilty if all your doing is the paper ornaments.  They are cute and the goal is to teach them about Jesus!  

I think that's it. . . for now.  I might think of something to add as I go and drift off to sleep, but feel free to email me or leave a message in the comments.  

If you are curious about our other traditions check these previous posts. 
click here, here, here, and here

Tuesday, November 25, 2014

Cards for baby girls

This fall, I got the really awesome opportunity to make some cards for our family ministry at church.  They happen to be a big fan of homemade things and asked me this go-around to make some girly-girl cards and boy cards.   I love playing with pink, which was probably the most obvious color to do when going super girly.  Plus, I love the pink, brown, and turquoise combo!  Boy cards coming soon.  Now, off to figure out what I need to make for Thanksgiving!  


Thursday, November 20, 2014

Buttermilk Spice Muffins

This has been the strangest week.  But, I wouldn't trade it for anything.  I got to go to my happy place (San Francisco) for my birthday.  It was a lot of work, but tonight, we are all back under the same roof and reality is setting in.  I'm also a year older. . . 35!  Believe it or not, I just don't feel that old.  I hope I always feel young!   So, before I head into an incredibly busy (and fun) weekend, I wanted to share this delicious recipe with you.  

One of my favorite places to have a good muffin is Mimi's cafe.  The Carrot Raisin is my favorite and previously posted this recipe. My sister has always favored their Buttermilk muffin, which is pretty delicious (a close second to the carrot raisin, but still delicious!).  Also, did you know that Mimi's has recipes on their website.  Yeppers!  And it's wonderful!  It was a huge hit with the boys in my house. . . they are, afterall, my biggest critics!.  


Mimi's Buttermilk Spice Muffins
adapted from Mimi's 

Ingredients:
1 cup sugar
1/2 cup butter, unsalted
3 eggs
2 1/2 cup flour
2 tsp baking soda
1 tsp nutmeg
1/2 tsp cinnamon
3/4 cup plus 1 Tbs buttermilk
1/2 cup sugar
1 cup walnuts
1/2 tsp cinnamon
1/2 tsp nutmeg

Directions:
Preheat oven to 375.
In a mixing bowl, cream together sugar and butter.  In a separate bowl, sift together flour, baking soda, and spices.  Add flour mixture to butter mixture alternately with buttermilk.  Don't over mix.
Make the nut topping by mixing sugar, walnuts, cinnamon, and nutmeg in a small bowl.   Line your favorite muffin tin with some fun liners and fill 3/4 of the way full.  Add a spoonful of topping on top of each cup of batter.  Bake for 20 to 25 minutes.


Monday, November 17, 2014

A New Thanksgiving Tradition

I'm not at all phased that Target has had out the Christmas stuff.  I think they may be the last ones to actually put it out (Costco had it out in September, right?).  It is my favorite time of year.  Gingerbread lattes, fog, cold weather, sweaters. . . it's pretty much awesome.  I actually listened to Christmas music this morning and didn't mind.  It was a foggy drive to my son's 6 year check up and it just felt appropriate.  But, first we have Thanksgiving.  And with Thanksgiving, a new tradition.


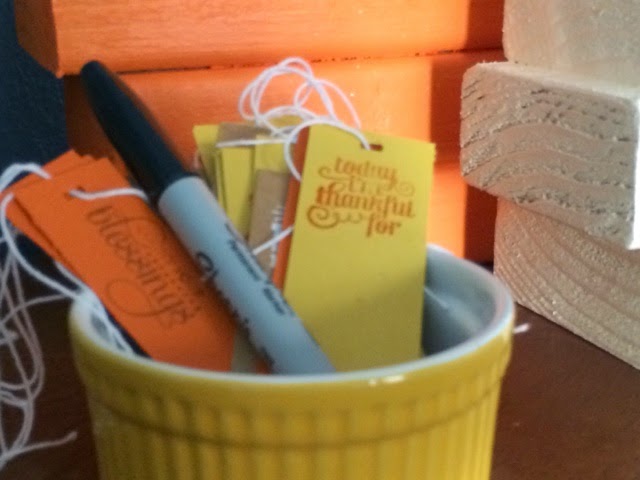
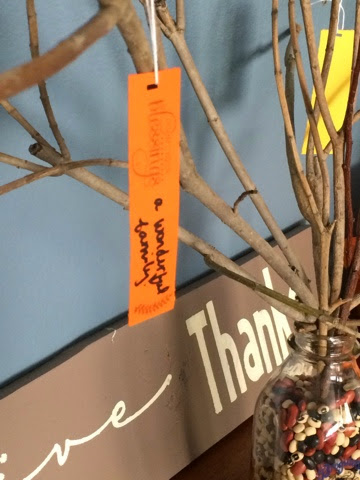
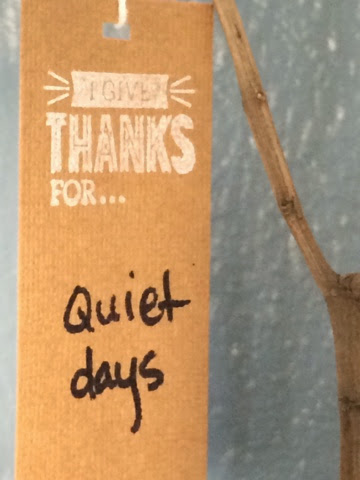
I wanted to start a Thanksgiving tree last year, but it just never happened.  I am so glad that my husband caught on to my vision when I brought in branches from one of our trees in the backyard.  Ethan loves putting things on there and came home begging to write his "I'm thankful" tag when he got home from school.  This made my mom heart so full!  He even made his grandparents write something down when they were over this weekend.  I love that he wants to show gratitude!  

 It really came together nicely.  I used some Kraft card stock along with Hello, Honey and Tangelo Twist (from Stampin up's In Color line).  I also used their new set Gratitude for Days.  

* Note: SU's website is having issues, so I will link you up later.  

Thursday, November 13, 2014

for baby. . .

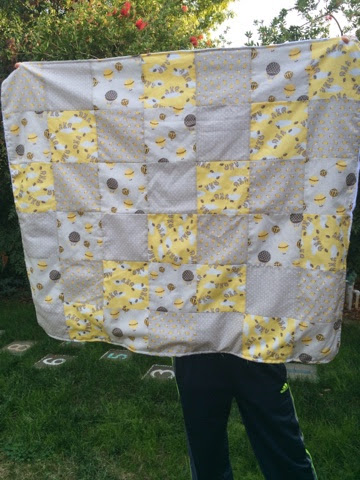
I am an expert at procrastinating.   Seriously.  In college, I did some of my best work at the last minute.  This project, a work in progress for about 3 weeks, included a couple late night dates with my friend, the sewing machine.  Good times!
I was looking for some fun yellow and gray fabric for a shower last weekend and came across this sweet organic fabric at our local fabric shop.  This wasn't grey, but the super pale brown was almost like gray and the fabric was oh, so soft.  I just did a simple patchwork of 5 inch squares backed with some soft minky.  I also made some coordinating burpees to go with it.

I also made this cute card. . . following the yellow and grey pattern.  I used the Hearts A Flutter stamp set, with barely banana, and basic gray inks.  I also used the sweet baby stamp from the Bitty Banners stamp set. I also used all the coordinating framelits to cut out the shapes.  The stars were from this embossilits set.  I used the hexagon texture folder for the background.

This was a super fun gift to put together.  I can't wait to meet the newest Gerking when he (or she?) makes his arrival.  Ethan and Weston can't wait to have a new cousin!  

Thursday, November 06, 2014

Thursday thoughts of randomness and Love

Today, I am home sick with the littlest.  Although, he doesn't seem to think he is sick, which makes resting kind of hard. . . so pardon my "I've been up all night" post of randomness.

November is a super full month. It's also one of my favorites!  Fall is usually in full swing and raking up leaves in our front yard is something that Ethan is begging to do, now that the leaves are finally starting to drop.  (the weather finally turned and we had to stop wearing shorts this week. . . yes, you can feel sorry for us!).  It's also my birthday month!  The big 35 is coming and it's crazy to think that's how old I will be soon when in reality, I feel like I just turned 22.  I hope I always feel this young! I also had my first Gingerbread Latte of the month year!  Seriously, this one has always been my favorite. . . even more than the PSL.  And there's something about the red cups that make me feel so happy.  Anyone else out there feel that way?

I'm completely in love with this nativity set. You should go check it out!

Speaking of nativity, I need to start getting some stuff together for our Truth in the Tinsel activities.  I am debating whether I should do something different this year or do what I did last year.  I kind of like this idea.

Last week, I was really wanting some Chipotle.  So we made our own (because, why not?).  I used this recipe and this one. . . and seriously we had burrito bowls for several days!  I was in heaven!  Definitely doing Chipotle night  err, week again in the very near future!

I have a super long list of cookies that I want to make.  I just need to make them.  Today this one showed up on my blog feed.  It might be made by the end of the day.

This free printable really makes me want to have a cookie exchange.  Maybe I will have to start planning one.

And now, I should probably start doing some house work and maybe sneak in a little nap (I'm exhausted!).

Hope you have a great day!


Tuesday, November 04, 2014

Halloween fun! {warning: cuteness overload}

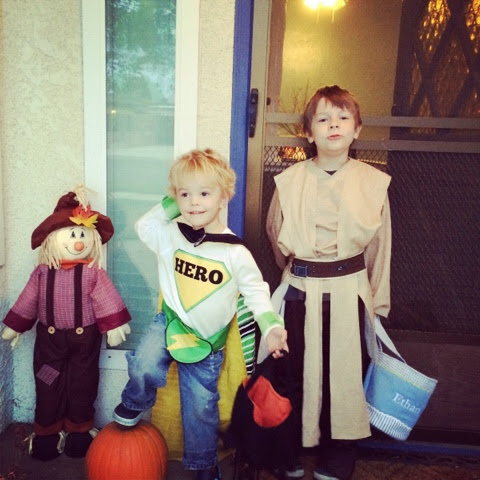
I know I have mentioned that fall is my favorite time of year, but this year was no exception.  This year was the first year the kids didn't get overheated from their costumes and barely made it inside before it started pouring.  Let me just say, that the rain was a huge blessing and I don't think any kid that came trick-or-treating really minded. . . mine sure didn't.
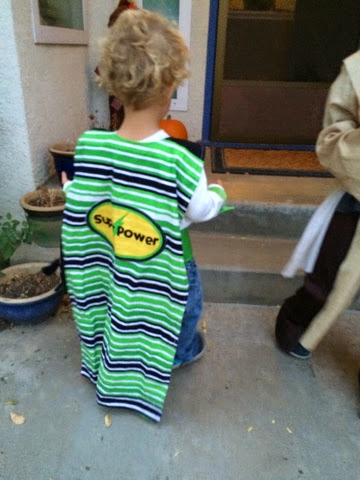
Recently, Weston has been really into the cape I made him last year for Christmas.  I actually don't think I ever got them blogged about (oops!).  I found these super cute panels on Fabricworm's website and instantly fell in love.  Weston actually could've cared less about his until a few month ago.  Now, he runs around the house all crazy like shouting "super boy" and it is probably just the cutest thing. ever!  So, for Halloween, I just finished the rest of pieces of the panel to complete his costume.  He loved it!  


We borrowed Ethan's costume, because he's going to be a Jedi.  We even surprised him with a lightsabor to complete his costume!  I seriously love this cuteness!  Oh, and we couldn't find Ethan's pumpkin candy bag, so he ended up using his Easter basket.  I think I might have been the only one really bothered by this.
Happy Candy Overload week!

Wednesday, October 29, 2014

Finally! {Marshmallows}

I feel really bad.  I can't believe I almost forgot to post this recipe.  So, I am going to do it now, before it is a whole year has gone by (don't worry. . . it hasn't even been 2 months.).  

So.  Homemade marshmallows.  At first thought, you might think:
 - she's crazy.
- uh, gross. 
- she's THAT mom.  (you know the one that makes us all feel guilty).
- That's so much work!

So first of all, I already know I am a bit crazy.  Ask my friends.  Even ask my husband.  It's true.  There's no hiding it.  In fact, if you've been reading this blog for any alloted time, you might have figured it out already. 

Second of all.  not gross.  Life changing, actually.  I'll be honest with you: the kids dove right in.  The parents. . . not so much.  They really are quite wonderful.  Espeically toasted, slightly melty, and combined with chocolate and grahams (you know. . .a S'more!).  

Thirdly, I did not do this to make moms all over the world feel guilty.  I did it because Ethan asked for S'mores and it was something on my baking bucket list.  I was in the mood for a challenge.  

And last, they were soooo easy.  (I say easy if you have a stand mixer.  If you have a hand mixer, expect it to be a tad more work, and for your arm to get a bit tired).  

We toasted them on parchment paper under the broiler for a teeny tiny bit. Just enough for them to turn a beautiful golden brown.  I sent a small batch with my friend Stephanie camping the weekend before just to see how they were with her s'mores.  She came back satisfied and wanting more.  But, she also said they got really gooey on a stick and would slide off.  So, we toasted them.  It went quick and was super easy.  We also sent the kiddos outside to enjoy their tasty treats. 

I made both chocolate and vanilla marshmallows.  I bought graham crackers in regular, chocolate, and cinnamon.  I also bought Hershey bars, Reeses Peanut Butter Cups, Ghiradelli Dark Chocolate and Caramel with sea salt, and Andes Mints.  My favorite was the vanilla marshmallow with regular grahams and dark chocolate caramel square.  So.very.delicious.  


The vanilla marshmallow recipe came from here

The Chocolate recipe came from here

Tuesday, October 21, 2014

Tuesday Thoughts


I am sitting here typing with the windows open and I realized I was cold.  Let me just say, it's awesome!  I even treated myself to coffee this morning because it was actually chilly when I took the oldest to school this morning.  This really is my favorite time of the year.  

I am really enjoying the Bible Study that I am in this Fall.  I get the privilege of co-leading it with an amazing Godly woman and it's a Priscilla Shirer study.  Well, It's Priscilla Shirer and she's probably one of my favorite Christian Bible study author's. 

I just ordered some new (well, new to me) books off of Abe Books. I've read them multiple times and have decided it's just time to own them so I can start it all over again.  I hope they come quick!  

I keep finding all sorts of yummy recipes on Pinterest and am finally feeling inspired in the kitchen.  Every now and then I kind of get in a slump!  Anyone else out there feel like this too?  (please don't tell me I'm the only one!). 

My fabric stash is a disaster.  I am thinking that my office needs a bit of rearranging, but I have to finish the other projects in the house before I start another room.  I really need to find some inspiration and maybe some time.  For now, I will just keep pinning inspiration and maybe clean.  

I took away the Legos this week.  They were driving me crazy!  Now, there are other toys all over and it's somewhat peaceful.  I even got a cat nap in this afternoon.  I'll take it!  I also think I need to start purging my kids toys.  I should probably start making a list of everything I need to do.  

But, for now, I am just going to go to bed.  It's calling to me.  


Friday, October 17, 2014

It's beginning to look a lot like fall {in my house}

Fall decided to come this week.   I am ready.  Believe me, October in the high 90's and sometimes 100's is no fun.  So, I decided to decorate for Fall.  I'm not really a Halloween person, but I love Fall and don't intend on changing the decor until I get the Christmas stuff out.  I looked around Home Goods and Target, for ideas and items, but seriously didn't really want to spend a ton of money.  So, I got on Pinterest and talked to my husband, and headed to Lowes.
I bought a long piece of wood and some paint samples, spending right at 10 dollars for this project.  The letters on the sign, I just used vinyl from my stash and my cricut and painted them.  I am going to be working on some tags for us to write out Thankful's starting in November!
Sources:
Corks - Michael's
Lantern - Ikea, but from a few years ago.  You can find one like it here.
Brown paint - Divine Buck, Target
Cream Paint - Lyndhurst Estate Cream, Valspar for Lowes
Orange paint - Autumn Gala, Valspar for Lowes
Pumpkin Tutorial - here.  I didn't follow the tutorial exactly.  We used different measurements and used liquid nails instead of wood glue.
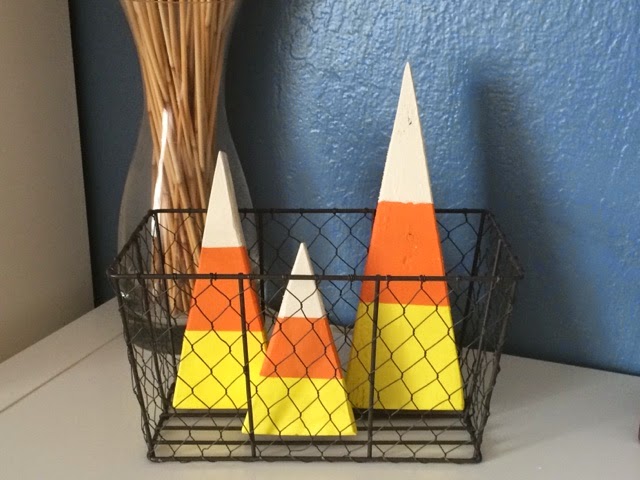
With the extra wood, I had my dad cut out triangles for some fun candy corn wedges.  I highly reccomend Frog Tape for this project!  Perfect lines!

Sources: 
wire basket - Dollar spot at Target
Paint: all from above, Yellow - Martha Stewart Satin Acrylic paint in Meadowlark from my stash.  I got it at JoAnns or Michael's.
And finally, my chalkboard.  Loving the way it came out!  I've got some sewing to do to finish some decor up.  Can't wait to share that with you! 

Do you decorate for Fall?  Please leave a comment! I'd love to hear from you. 

LinkWithin

Related Posts Plugin for WordPress, Blogger...