Tuesday, December 19, 2017

King Arthur Flour Bake-Along: Star Bread

 The three weeks that fill in the time between Thanksgiving break and Christmas Vacation go by way too quickly!   Yesterday marked the first official day of vacation and we soaked it in.  We cuddled on the couch and watched a Christmas movie, we did a little bit of cleaning, we worked on our truth in the Tinsel ornaments, and we read.  It was wonderful!  Definitely loving this stage where the kids kind of do their own things and help around the house!  There is no dreading vacation here, but more anticipation of hanging out with them.  It's funny how quickly things change, so sweet moms of littles. . . there is hope.  Hang in there!  It is bittersweet as the stages change, but oh, so wonderful! 

Despite the hurry over the last three weeks to get as much stuff done possible before the kids were home all day long, I did a little baking.  I can't help it.  It's kind of something that I make room for for a few reasons.
1.  We need to eat.
2.  This one way I give myself margin.
3.  Trying a new recipe and learning something new fill my cup.   It's just how I roll. 
 I recently decided that next year, I will be joining in the fun of the King Arthur Baking Challenge.  Each month, they post a new recipe for their baking audience to try out.  They give step by step directions and even make video tutorials so you can really see what is supposed to go down with those recipe directions.  (you know the ones where you read it a bazillion times and you kind of aren't sure how the heck you are supposed to do something. . . it was like that for me and babka.).  The recipe this month inspired me and once I grabbed all the ingredients, I got to work.  
 The first step is always making the dough.  This recipe was ridiculously simple.  It has potato flakes, which at first glance is weird.  But it works.  Also, I was able to find small pouches for like a dollar and it was more than enough for this recipe.  Don't be overwhelmed by strange ingredients. Take all the ingredients and mix together.  Seriously, super easy.  After that, it just sits there and looks pretty. 
 These twists. . . this was the part that stumped me.  I ended up watching the tutorial that KAF made and I really just over complicated it.  It was two slits and twist twice in the opposite directions and pinch together.  It might looks so weird at first, but it puffs up a bit in the oven and ends up looking amazing. 

 My kids were so excited to eat this last Sunday morning.  In fact, they the biggest battle was who was claiming the middle.  I mean, the middles are the best!  I accidentally pressed too hard in my center, so it cut about 2 of the layers. . . oops!  Also, the star reminds me of the star from Tangled.
Have I left you drooling yet?  My oldest just came in and asked if I was going to make this again anytime soon.  I should.  It was easier than I thought, but it actually looks like I spent all this time on it.  You should make it and wow your friends, too!

Star Bread
adapted from King Arthur Flour

Ingredients:
2 cups all purpose flour
1/4 cup instant mashed potato flakes
1/4 nonfat dry milk
3/4 cup to 1 cup lukewarm water
1/4 cup unsalted butter, room temperature
1 tsp vanilla
2 tsp yeast
2 Tablespoons sugar
1 tsp salt

Directions:
Carefully add your ingredients into your your mixing bowl and knead with your dough hook, until your dough is nice and smooth.  Start with the 3/4 cup water and slowly add more until you get to the right consistency.

Lightly grease. a bowl and place your dough inside and cover.  Let it rise for at least an hour (mine rose all day). 

Divide the dough into 4 equal balls.  Place on parchment paper and let them hang out for about 15 minutes. 

While that's just hanging out, prep your filling ingredients:

  :: 1 beaten egg in a bowl
  ::  another bowl with 1/2 cup sugar and 1 tbsp cinnamon. 

Roll out each ball into a circle about 10 inches in diameter.  It doesn't have to be perfect, because you will be twisting it and baking it, and it really does hide any mistakes you might make. . . trust me!

Place first circle on baking sheet.  Brush with egg and sprinkle with cinnamon sugar mixture. 
Cover with second circle and repeat process.
Keep doing this until you put that last circle on. . . just don't do the egg white/cinnamon sugar mixture. 

Find a round cookie cutter and gently (don't be like Jolie and cut almost all the way down.) place it in the center.  It's just there to remind you not to cut into the circle area.  Then, take a sharp knife and cut 16 strips all the way around that middle circle. 

Then take two strips that are right next to each other and twist twice in opposite directions.  Then pinch them together on the top.  Continue until all the strips are twisted.  Let it rise for about 45 more minutes and then brush with a bit of that remaining egg from earlier.  Stick in a 400 degree oven for 12-15 minutes. 

Then listen to everyone tell you how amazing you are.  Trust me.  You will wow everyone. . . just don't tell them how incredibly easy it was! 

You can go here for picture by picture of how it's done.  It helps!

Happy Baking! 

Wednesday, December 13, 2017

Being a blessing {Free Printable}

As a kid, I remember the mail man who had the route on our street.  He would talk to my dad at the mail box like old friends and he knew us by name.  Every year, my mom would make a batch batches of her pomegranate jelly.  She would always stick a jar in the mail box for our our mail man.  It was one of those memories that I always wanted to copy, only there are a few differences in my childhood compared to my present.  First of all, I live in a much larger town, where the person who delivers my mail could be anyone of 5 or 6 people.  Some of them more pleasant than others (as in my mail doesn't always make it to my front door and when the kids were little, they would ring the doorbell as loud as they could during naptime even though I asked them to knock), which makes it sooo hard.  I also, don't have a mail box. . . it goes directly into my house, which is a bit harder to surprise someone with. 

Until, a week or so ago (I don't remember), a friend posted on instagram this basket with goodies for their delivery guys.   It was so cool!  And totally not something hard to do either.  Just some stuff out of the pantry and a sign.  All this to say thank you to them for saving us time on our shopping (thank goodness for Amazon Prime!).  I couldn't help but copy her. . . it was such a wonderful idea!

I grabbed some snacks that I had bought for the kids, some coke minis, sparkling water (because I'm obsessed, some bottled water, granola bars and M&M's and threw them in a bin I had laying around.  Then, I quickly designed a simple little sign and stuck it outside.  Seriously the easiest thing that can make such a big difference in someone's day. 

Yesterday morning, our mail man rang the doorbell with one of our orders, and he was just so grateful for the goodies.  He said it really helps them!  I'll be honest with you, I wasn't even sure they would take anything, because I had stuck ice cold waters out during the summer for them and no takers (and our guys walk our streets delivering the mail in triple digit heat!).  But, this guy, was honestly grateful and it just made my day that he could be blessed! 

Want to join in the fun?  

You can print out your own sign here.  

 Let me know how you are using it by using the hashtag #outoftherightbrainblog.

Have a wonderful day! 


Friday, December 08, 2017

Friday Favorites {Chrismtas Shopping Edition!}

Christmas is just a few weeks away and while I've spent my week getting as much shopping done as possible before the kids get out for vacation.  With all the shopping I've been doing, I was thinking about what things that I am really loving lately.  Things that make me smile and maybe might inspire you if you are stumped on a Christmas present idea (I am. . . it's no fun!).  So, here's a list of a few things for the kids, a few things for that kitchen lover, and a crafty thing (my mind started shutting down for the night. . . so I stopped).  I hope it helps or maybe brings you some inspiration. 

Kids:
Today, I purged my kids toys because it was just time.  It was time to get rid of all those wonderful toddler and preschooler toys that have been traded in for legos and art supplies.  I'm going to preface this portion of the post, by sharing that my boys are now 9 and almost 7 (as in, I should start designing his birthday invitation soon).  These three things, aside from Legos, are what they are super excited about these days. 

Fling Shot
I had seen this at Target earlier this summer and when it went on sale before Thanksgiving, we bought it as part of their big boys bedroom transformation (Coming soon).  Friends, this game is so much fun!  It's completely magnetic and you can turn it over and play tic tac toe.  We haven't put any holes in the wall yet, so I'd say that's a win!  You can find it here at Target.

K'nex Systems

In all honesty, Legos are the main toy of choice for my kids, but we discovered K'nex this fall and they are are pretty awesome.  Ethan is really in to making things work, this roller coaster has a car that goes along the track using a clock arm.  In some ways it challenged him more than a basic Lego set does.  You can find it here

Color Alive Coloring Books
These books are super fun!  The kids like to chill in front of a movie and just color (one is doing that as we speak), so I am always looking for something fun to color.  Plus, these are great for road trips or times when we are waiting.  These are great because the illustrations that they color, they get to snap on our iphone or ipad and they come alive.  They can make Captain America sit on our couch or walk in our front door.  Technology is amazing!  You can find these here. 

Plus Plus


We discovered these this summer, when I was looking for things to fill their travel backpacks and they were such a hit that we bought them more for their stockings this year (shh! It's a secret!).  They basically are these colored plastic ++ (two plus' put together) and you build with them.  The are a lot of fun because you can build things for them, like the box above is for robots, but they are also open ended, which are my favorite toys!  I want to see where these boxes take my child's imagination and the things that they created while sitting at the airport or hanging out at our hotel before bed, was amazing. 

Kitchen:
These three kitchen things are my most used, favorite things ever.  I've talked about them before, but they are seriously the best and if you are in need of a wonderful gift for someone who loves to get creative in the kitchen, here are some of my favorites.

Microwave popcorn maker


We just bought this, and it is super cool!  These are great if you don't want to go to the store and buy microwave popcorn with all the yucky stuff or you don't want to pull out your Whirley Pop for amazing popcorn.  It is simple and works wonders!  Plus, it's dishwasher safe, so definitely a keeper! Here's the link. 

Frother:
I know I have mentioned it a few times, but this thing is amazing.  It gives that perfect frothy milk for your lattes and hot chocolates.  It also does almond milk like a star, so that's an even bigger plus! 
You can find the link on amazon here. 

Corkcicle Coffee Cup


This is a new find. . . like last weekend.  I've always wanted to bring my coffee to Bible Study (because going to that much adds up. . . a lot), but my coffee is always cold before I drop off the kiddos at school.  This basically is the best one I've tried.  The lid is wonderful, too, because we all know that it really matters.  They come in all sorts of pretty colors and manly colors. . . my husband is eyeing the charcoal black one. . . it's super sleek! 

Espresso Powder

This stuff is pretty much amazing and a really fun gift for that baker in your life.  It's kind of expensive, but it totally amps up a chocolate cake or you can make these muffins and amaze your co-workers with your culinary excellence.  It's definitely a good gift for that baker friend who likes to try new recipes. 

Crafty:
I could only come up with one, partly because this is ending up being a long post and I am tired, and also because I haven't been buying things if I don't need them.  You probably don't want to hear how much I love titanium needles for my sewing machine or stuff like that, so I will just leave this one here because it so wonderful!

Paper Pumpkin Subscription
I love getting mail, and this is one of my favorite deliveries each month!  I don't always have time to do them, but I am guaranteed to have cards for peoples birthdays throughout the year!  There are even some gift packages for giving things away, which has been wonderful for spoiling the kids teachers or my friends.  I also like it because it challenges me to try a different design or just take a few minutes to get creative during a busy week.  Getting creative fills my cup!   Each month, you get a small stamp set, ink, and everything you need to make the card.  Sometimes there is enough left over to make the cards go farther or get creative with the leftovers. 

What was something you purchased or were gifted this year that made your year rock?  
 If you have any gift ideas you would like to share, please comment or message me.  I am always looking for ideas for all the people in my life and would love to hear what things your are just swooning over these days.  Feel free to leave a comment below. . . those comments really make my day (really, they do!). 

I should also add that NOBODY paid me any money to write this post.  I get nothing.  It's just me sharing ideas with you.  No biggie.  Thanks for reading it! 


Wednesday, December 06, 2017

Let's talk Chocolate Chip Cookies

Chocolate chip cookies are my favorite of all cookies, especially fresh out of the oven.  I am that person who burns my tongue because I can't wait for them to cool just a little bit.  The ooey gooey melty chocolate goodness of a freshly baked cookie is my weakness.  I am drooling just wring this.  There's pretty much no time that we don't have chocolate chips in the house so we can make cookies on a moments notice.

Nine years ago, Jon challenged me to find the best chocolate chip cookie recipe because he didn't think anything could be better than Nestle Toll House (to be said like Pheobe from Friends. . . you know you read it that way!).  I was sure that there had to a better recipe, and you know what, there is.  There are a lot of recipes that are just flat out better.  We haven't made those classic cookies in ages and no longer does Jon refer to them as the regular recipe.  It is safe to say that it has been replaced with several better ones.

So, today I am going to kind of give you a run down of some frequently asked question and share some of our favorites, so make sure you read to the end so you can make our favorite recipe. 
 The 4 Types of Chocolate Chip Cookies
Baking cookies is super scientific and I am no way a scientist (science and math are by far not my strong suits!).  But, there are 4 basic types of chocolate chip cookie:
The classic that gives you a thinner cookie, with crispy edges, like your Nestle Toll House cookie. The Cakey Cookie which is higher and softer, almost like eating cake.
The crispy cookie that is thinner and crunchy all throughout the cookie.
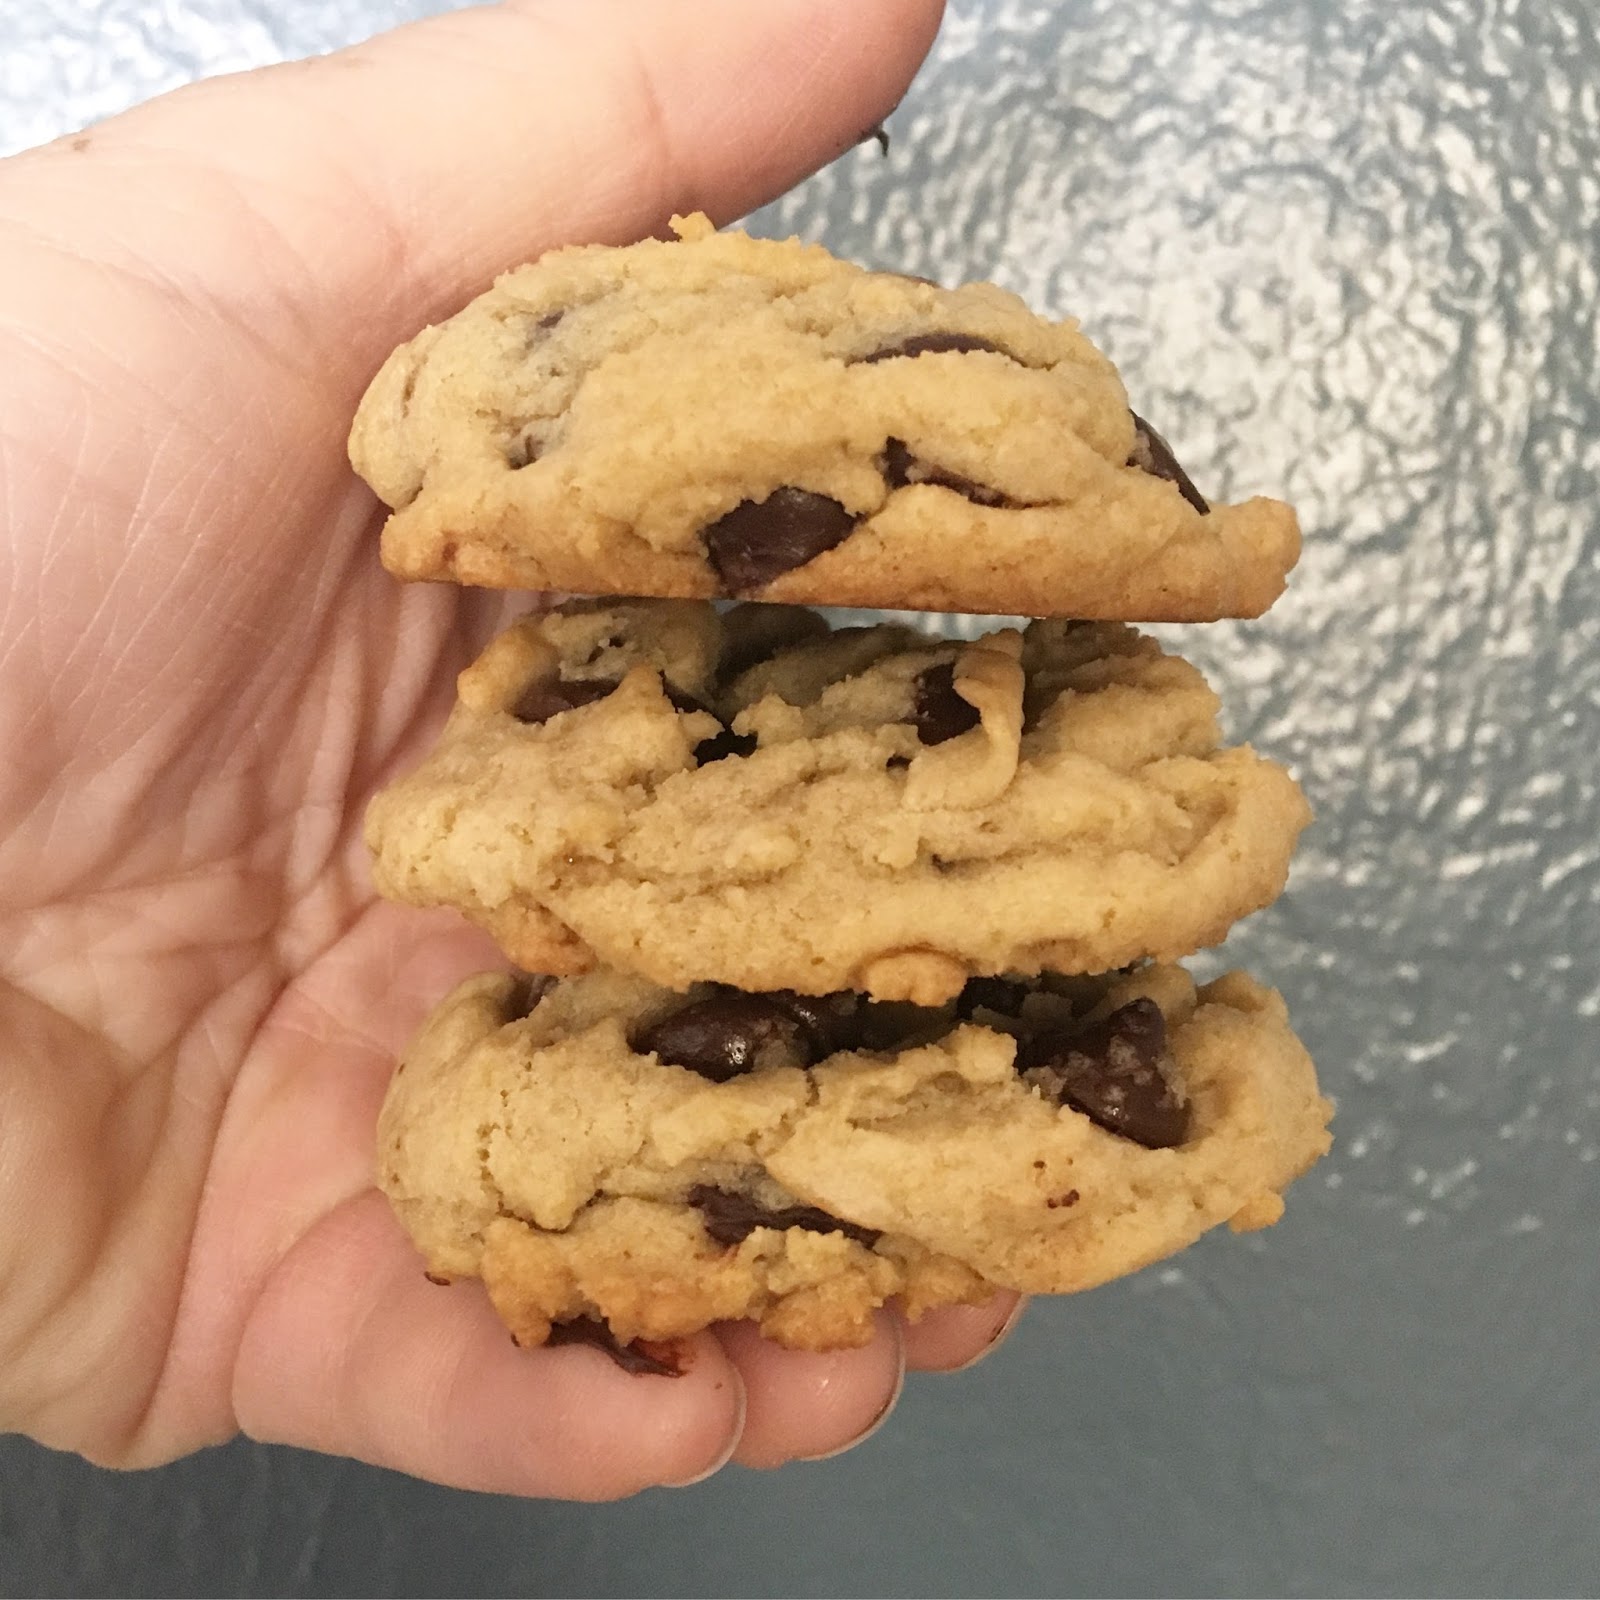
 And finally, the Chewy cookie. . . my favorite.  It is denser, less cakey, and super melt in your mouth.   All these cookies are different because they depend on how soft the butter is, how much flour and that scientific stuff. . . the baking soda/powder element. 
 The most common question I get:
I am constantly asked how I get my cookies to be so fluffy.  This is because I specifically choose recipes that will result in a fluffy, chewy cookie.  These cookies usually have an egg yolk/whole egg combo, melted butter, and corn starch in the ingredients.  These ingredients are a game changer and the result will blow everyone away with how delicious they are!
 
Tips:
:: Your chocolate Chips are a big deal.  The best ones (in my opinion) are Guittard brand chips.  These are a bit more pricey, but you can find them at most Target stores for almost the same price as Nestle or Ghiradelli.  Ghiradelli would be my next favorite.  One of our favorite things about Guittard, is they don't put a ton of additives (like soy) in their chips, so you get a better, more consistent chocolate flavor.

:: Use semi sweet or dark chocolate because your base is already sweet.

:: Don't leave out the salt.  Want to really impress someone?  Sprinkle salt flakes over the top of the cookie before it bakes.  I use unsalted butter, but if you use salted, don't use as much salt, because you might end up with a salty cookie.  Also, know your salt. . . there are tons of different salts out there and each one varies on the salt scale (is that a thing?).  For example, sea salt is my go-to salt, so i use less, because it is a saltier salt.

:: Substitute vanilla bean paste for an even better flavor!

:: Make sure you cream the butter and sugars. . . for several minutes.  This is important and most people forget this step.  The butter and sugars should turn into a creamy light color and not look all chunky.

:: While creaming the butter is super important, it is also just as important  not to overwork your dough once you get your flour and leavening in.  The amount of times you mix that dough depends on how soft your cookies will be.  We could get all scientific and talk about gluten networks but you should just watch some Alton Brown. . . he has an episode that explains how gluten works that is really neat.

:: As hard as it is, let your cookie dough rest for a bit before putting it in the oven.  A lot of times, you will notice that your last cookies turn out better than the first and that's because the dough has been resting for a bit. 

:: Some cookies call for chilling the dough.  So important because you want to cool that buttery, fatty goodness so that the cookies will not overspread.  You can stick the dough in the freezer for half the time and it will accomplish the same thing.  

:: Don't overcook your cookies.  I usually cook them for the minimum amount and let it sit on the cookie sheet for another minute and then take it off.  They keep cooking for a few minutes, but this helps make the most perfect cookie ever!

:: Use a cookie scoop.  It's worth it!

:: And a silpat or parchment paper. 

 My favorite Recipes for making Chocolate Chip Cookies are:

Smitten Kitchen Chocolate Chip Cookies - these are the famous David Lebovitz cookies that actually a bit controversial.  She has the whole story on the blog post that this recipe is on. 

Smitten Kitchen Salted Chocolate Chunk Cookies - I don't usually have chocolate chunk pieces, but these are so good with chocolate chips, so make them.  Sprinkle that salt. . . tell your friends it's fancy.  I won't tell if you eat the whole batch!

 Big, Fat Chewy Chocolate Chip Cookie

mini chocolate chip cookies - these are my go to for gift giving.  They are perfect for filling mason jars and bringing just a smile to someone's face. 

And this one. . . the tall, skinny method is my favorite!

 What if I can't have gluten?
Don't lose hope.  We live in a wonderful time where there are a lot of alternatives and helpful ways to make delicious recipes accessible to special diets.  When Ethan was in first grade, his teacher was gluten free and she became my guinea pig.  I tired so many mixes and well. . . they were just okay.  I finally tried the Bob's Red Mill gluten free baking flour (just substitute equal flour for the flour in any one of these recipes above and it will blow your mind.  No joke.  Best gluten free cookies ever. 

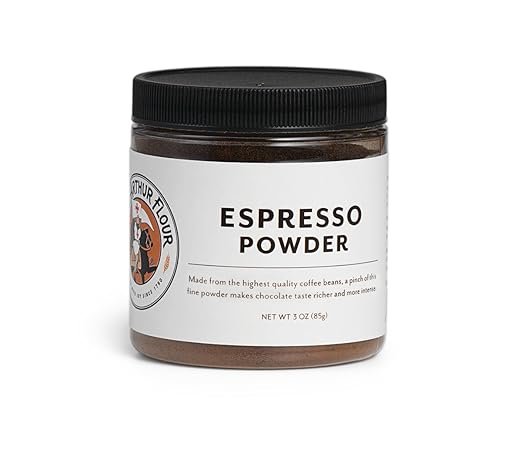
If you aren't wanting to make them from scratch, the King Arthur Flour Gluten Free cookie mix is amazing.  All you add is the flour, egg, and chocolate chips!  My kids couldn't stop eating them!

And my absolute favorite recipe:

Chewy Chocolate Chip Cookies
adapted from Bake from Scratch 

Ingredients:
3/4 cup butter, melted
1 cup light brown sugar
2/3 cup granulated sugar
1 large egg
1 egg yolk
1 Tablespoon vanilla
2 cups all purpose flour
1/3 cup bread flour
2 tsp cornstarch
3/4 tsp baking soda
 3/4 tsp salt
1 1/2 cup chocolate chips

Directions:
Preheat oven to 350 degrees.

Beat butter and sugars until light and fluffy (remember I said that it takes 3-4 minutes. . . I was serious!).  Stop every now and then to scrape the sides of the bowl.  This also gives time for the butter to cool off for a bit so you don't start cooking the eggs when you put them in.

Add your eggs and vanilla.  Beat well.  Slowly add dry ingredients (flours, cornstarch, baking soda, and salt).  Don't over mix!  Carefully stir in chocolate chips.  Scoop out dough and place a few inches apart on your lined cookie sheet. 

Bake for 9 minutes.  It's okay if they look not done. . . they continue cooking out of the oven for a few minutes and you don't want to over cook them so you get that chewy, melt in your mouth soft cookie goodness. 

Cool on a wire rack. 

Happy Baking!  


Thursday, November 30, 2017

What's for Dinner {Thanksgiving Wrap Up}

It's hard to believe that Thanksgiving is already a week behind us and now we are marching full on into the Christmas season.  Confession: from October through January, I am in bliss.  The lights, the decorations, the family and friends, and of course the food.  The calendar is full of gatherings and get togethers, and it is wonderful!

Last week, we spent our Thanksgiving with my husband's family and it was full of delicious food, great conversation and fun times.  So, I thought I would take a few minutes and link you to all the delicious things I cooked up last week for Thanksgiving.  We also make a small Thanksgiving dinner for the four of us on the Saturday after Thanksgiving.  It's our I had a few friends ask for the recipes, so I put them all in one place.  Also, for selfish reasons, these "What's for Dinner" posts are working great for my records when I want to go back and remake something.

Also these recipes would be great for all year round. . . so check them out, pin them, or even add them to your menu plan this week.

I signed up to bring a salad to our family potluck and could not decide on which one, so I brought two!  Both were amazing and I even made the Brussel Sprout one for our small family Thanksgiving).

Reminder:  Links are at the bottom of the page.

1.  Sprout and Bacon Salad
This one was one of my favorite new recipes!  Like I said, I made it twice.  I skipped the shaving the sprouts on my mandolin because that just sounded like a ton of time. . . those things are small!  Thankfully, at most grocery stores you can find them already shaved. . . time saver!!!  This one was super easy with only 4 ingredients and the salad dressing that you can make the night before in a mason jar, and shake it up when you need it and pour and toss.  Super easy!

2.  Apple Cranberry Walnut Salad
I am always up for a spinach salad with fresh fruit in it and this one was awesome!  I searched Pinterest (because it seriously is the best!) and found one by one of my favorite food bloggers.  This recipe, it was the Apple cider dressing that made it a winner.  (I also made it the night before and stored it in a mason jar for the next day).  I also used candied pecans from Trader Joe's that were perfect for this salad.

3.  Brown Butter Mushrooms
Roasted veggies are probably my favorite way to eat a veggie. And while mushrooms are not everybody's favorite,this one is so delicious.  I mean, brown butter makes everything better.  Honestly, if I see brown butter in a recipe, it usually becomes the one I pick.  This one was super easy to make just a bit before heading out the door.  

4.  Parker House Rolls
I've been looking for an excuse to make these parker house rolls and when I texted my sister in law to see if someone had signed up for bread, it was the perfect excuse to make these!  I've been super impressed with the Bake from Scratch magazine's bread recipes.  Everything I've made has been wonderful.  My rolls popped open, so they looked funny. . . but they were amazing.  I didn't think we were going to have any left for our feast, because Jon kept munching on them.  They were so buttery and soft.  Definitely going to make these again soon.  These were great because they made over 30 rolls, so perfect when baking for a lot of people!

5.  Crockpot Roasted Turkey Breast
I picked up a 4 pound turkey breast last week for our small family Thanksgiving this past Saturday.  I knew we were going to be busy decorating for Christmas and I knew I didn't want to spend all day in the kitchen, because I was kind of tired of cooking.  For two weeks, I think that's all I did.  So, tired may have been an understatement.  I loosely followed the recipe and added a few things. . . because I didn't want to go to the store.  I had a had some small bulbs of garlic, so I used two, used the last of my red onion and added two orange halves for my turkey to sit on.  This part is key, because the turkey juices sit at the bottom and prevent the turkey from becoming too moist. . . we didn't want shredded turkey for thanksgiving, but rather moist sliceable turkey.  I also did a dry rub instead of a wet rub, but with the same ingredients.  Super easy and it was perfect.  Also, I made gravy with the juices and it was so garlicy and delicious!  Perfect for dipping the turkey pieces in.  I might be drooling as I type!

6.  Sourdough rolls
I don't have a picture of these because they came from Food.com.  I needed to do something with my starter and so I whipped some of these up for our little Thanksgiving and the kids gobbled them down.  Perfectly sourdough and spongy! 

7. Pumpkin Cheesecake (Dairy, Gluten, and refined sugar free!)
Can we just be honest.  Dairy allergies are horrible.  All the good pies and desserts have dairy in them and I wanted so badly to be able to partake in the full festivities!  This year, I decided to make a dessert so Weston and I could enjoy.  This cheesecake was so tasty!  I would never have guessed that the crust wasn't actual graham crackers!  Dates.  Nuts.   Game changers!  Also, there was no reason to feel guilty after eating this dessert!  If you know someone who can't have dairy or gluten and want to make something yummy for them. . . make this!  It will make their day, trust me!


1 / 2 / 3 / 4 / 5 / 6 / 7

Wednesday, November 29, 2017

when your friends have babies

I think one of my favorite things about having my kids in school is the few minutes before pick up when the moms (and dads, and grandparents) gather waiting to grab their kids and go home.  It's the perfect opportunity to hang out and talk and meet people.  I have met some of the most amazing ladies just hanging out after school.  One of these sweet friends just had a the most beautiful baby girl and well, this mom of only boys had some fun!  Bring on the pinks and flowers. . . and butterflies! 
 I went super easy on this one and sewed strips of fabric together and then sandwiched the backing, batting, and quilt top to the front with some super amazing adhesive spray. . . it is a must when doing the quilting.  I just quilted straight lines on each side of my seams.  It was so easy and so quick!  I also did a cheater binding because. . . well. . . I was lazy.  I followed this tutorial and it was so easy. 

Also, this quilt has a couple of mistakes that I kind of just left.  I am not a master quilter yet (my mom is amazing at it!), but I'm not really sure if any quilt is perfect.  I remember when we were putting together some quilt squares that my sister found after my great grandma died.  One of them was was purposely made wrong, so that you could always remember that no one is perfect.  Also, a little secret. . . straight lines are amazing.  You don't have to worry about your corners lining up!  Like I said, I am still learning this quilting thing! 

Also, I think that I will be making a step by step tutorial for this one soon!  Be on the look out! 
My boys are already planning their next quilts and there are 3 on the list before I can start making them more.  Weston was so excited this one was going to his friend's little sister, but I am pretty sure he secretly wants one just like it. . . just not pink. 
And seriously. . . when did my oldest get tall enough to hold a blanket so it wouldn't get ruined in the wet grass?  Also, he's totally wearing my flip flops. . . they almost fit him.  I just bought him new socks the other day and I'm pretty sure I can fit them!   If you are wondering what our chalkboard hopscotch says. . . Go Raiders.

And that's that!  Enjoy your day and thanks for reading! 

Wednesday, November 22, 2017

Connection Time!!

 Happy Thanksgiving! 

First of all, let me first start out with saying how thankful I am for You.  You read my blog.  You take the time out of your busy schedule and read these words that I put down on this blog.  I hope and pray that you are encouraged each time you visit!

So, now, grab whatever drink your heart desires, sit down, and let's chat.  Let's gather together and share our hearts and what's going on in our lives.  Let's connect more than just me sharing a recipe or some crafty thing.  Let's share our hearts.  
We have this whole week off and it really is the best.  Our schedule is suddenly not full and we are soaking it in.  There has been lots of TV and video games logged,  a visit to daddy's work and lunch, and today. . . well, I am half way thru a venti Gingerbread latte and I am determined to get all the things done.  My oldest has taken apart all of his brickheads and is working his way rebuilding them all.  Cars 3 is on for the last time before we have to return it to redbox in a bit. 


 Now, let's get to the questions.  I've got my coffee. . . do you have yours? 

Outside my window the sun is shining brightly. . . it's going to be a whopping 78 degrees today and all I want to do is wear a warm sweatshirt.  Ha ha!  However, the tree outside our front window has finally turned colors and started shedding its leaves.  It's a great tree for the neighborhood birds, so each time they flutter around, it starts raining leaves!  I could watch it for hours!

I am thinking
about having to come up with a plan B for the salad I was bringing for Thanksgiving.  I couldn't find shaved brussel sprouts anywhere!  I didn't think it was going to be that hard!  EEK!  Suggestions accepted. 

From the kitchen
Oh my goodness!  The kitchen has been super busy lately!  Today, I am making bread dough, a vegan pumpkin cheesecake, and the salad dressings for my salad.  Thanksgiving prep is underway!  What are you making for Thanksgiving?

I am wearing 
Yoga pants, running shoes, a t-shirt, and a zip up sweatshirt.  I am in dire need of a shower, but plan on getting on the elliptical and cleaning, so that's not going to happen for awhile.  Honestly. . . I'm keeping it real right now.  Also, I hate wearing good clothes while I am cleaning or cooking.  However, I did just buy the cutest booties. .  . these ones.  I honestly can't believe how comfy they are and how much I really like them!  It took me a while for the style to grow on me and I'm so glad I bought them!

I am creating Lots of things in the kitchen, but currently I am working on Ethan's quilt, getting Advent prepped and packaged, and a few home decor items. 

I am going
to the beach soon.  It's really my happy place! 
  I also feel like we should talk Black Friday here. . . do you guys go full on black Friday shopping? We just head to Target when we get around to it.

I am reading  Wonder.  It's been so busy this week, I haven't gotten a chance to read it.  Ethan and I are racing through it so we can go see the movie together.  It's such a good book! 

I am hearing 
the tinkering of legos and Cars 3 in the background.  It's gonna be a good day! 

Around the House
The house is still decorated for Fall. . . I just can't bring myself to do it until this weekend.  Our goal is to get it done by December 1st and then when the kids are at school, I put the finishing touches on things. 

One of my favorite things
GINGERBREAD LATTES.  I wait patiently all year for them to make their November debut.  They really are Christmas in a cup!  Also, one of my favorite coffee shops just opened a drive thru super close to my house. . . so awesome! 

A few plans for the week 
slow down, savor, enjoy.  While I am focusing on getting things done, I am also enjoying this time to slow down and just relax.  There's been a lot of cuddling and vegging.  I think we are all tired and have just needed this break! 

What I am listening to
Christmas music.  The radio stations started playing it and I decided the other day, that I am going to enjoy it! It's just so happy! 


 Now, it's your turn!  Grab your coffee and let's connect! You don't have to do them all! I can't wait to hear from you! You can even private message me if you don't want to make it public.  

Outside my window
I am thinking
From the kitchen
I am wearing
I am creating
I am going
I am reading
I am hoping
I am hearing
Around the House
One of my favorite things
A few plans for the week
What I am listening to 

Monday, November 20, 2017

Amazing Pumpkin Pie

 I love this week.  I love Thanksgiving. I love how a holiday around food and gratitude brings families and friends together.  The only gift given is time.  Cousins playing together, games played, chatting over coffee and pie, exchanging recipes.  It really is my favorite!  My kids get the whole week off, the leaves are falling off our trees, and it's finally cold.  All of that makes my heart so happy.  One thing that I love is that our calendar kind of slows down.  Soccer is over for the fall season, Bible Study is done until January. . . guys, my schedule is slowing down and it's wonderful!  I confess, I may have filled it up a little full this fall and I kind of regret it.  So, this season of Thanksgiving I am welcoming the opportunity to slow down and savor the holidays, Thanksgiving included. 

Today, our first day of vacation, is my favorite.  The kids are playing quietly.  The TV has been playing Clone Wars non stop, a few chores have been done, but the kids are cozy in their sweats and relaxing.  We all need a day to just rest and take it slow.  These kids work hard at school all day and their brains need a break. . . just like ours.  So, it's our tradition to mark vacation with a veg out day.   Like I said, we are just slowing down and savoring.
 Pumpkin Pie is a family favorite.  We absolutely love the Costco Pumpkin pie, but it is sooo Huge and well, who really wants to enter that mad house the week of Thanksgiving?  Add taking your kids and well. . . I am just not sure I want to go that route.  I am not making Pumpkin Pie this year, but I had to make it for Weston's Thanksgiving feast on Friday.  There was no  time to go go Costco, and I needed to make a bunch, so I was thinking slab pie would be the best bet.  Guys, can we just say Game Changer!  This recipe was amazing and so easy!  I will definitely be making it again. 
 Also, this recipe could easily be halved,  or it can make about 2 slab pies or a bunch of little mini pies.  Which, by the way, or so easy and the perfect way to serve a bunch of people with out having to dish out slices of pie.  And, hey. . . portion control, right?  There's always so much food to eat, so why not make it easier to try different kinds?    I just used my Pampered Chef cut and seal to cut the circles and put them in my muffin tin.  Easy Peazy. 
Drooling yet?  Ready for some Thanksgiving indulgences?  Make this pie and wow your family or your friends at Thanksgiving. . . or just keep it and eat it after the kids go to bed.  I won't tell. 

Here's the recipe:

Pumpkin Slab Pie
adapted from Goodhousekeeping.com

Ingredients:
Refrigerated Pie Crust*
2 (15 oz) cans of pumpkin
1 tsp. ground ginger
1 1/4 cup  heavy cream
1 1/4 cup whole milk
4 large eggs
1 cup dark brown sugar
 1/2 cup granulated sugar
2 tsp. pumpkin pie spice
1 tsp. salt
whipped cream, for topping.

Directions:
Preheat oven to 400 degrees.  Roll out 2 pie dough circles to make a rectangle**.  Carefully lift it up and place it in a 13x9 inch sheet pan (with edges) or a casserole pan.  Fold over edges and crimp.  Then, stab a fork into the the dough to prevent bubbling.  Bake for about 10-14 minutes until golden brown.

In a large bowl, combine pumpkin, ginger, heavy cream, whole milk, eggs, sugars, pumpkin pie spice, and salt.  Mix well, until nice and creamy.  Pour into baked pie crust and bake for 25 minutes or until set.  Cool completely before cutting.

If you are going to make the pumpkin pie cups, follow the same instructions, except cutting circles and placing them into a muffin tin.  Circles should be 3-4 inches in diameter and should bake for slightly less time. 

*I used Pillsbury pie crust.
** If using a larger sheet pan, like a jelly roll, roll out 4 circles into a larger rectangle and proceed as normal.  It might take a bit longer to cook because it is bigger, so keep an eye on it.


Thursday, November 16, 2017

Corn Chowder (dairy free)

 
 Oh fall, I love you.   Really, I do!  In fact, I am having a hard time focusing on this blog post because it just got all dark and overcast and all I want to do is curl up in a ball and go read a book.  Or sleep.  Either one would be nice.   Does anyone else have this problem, or is just me?  I am such a sucker for freshly fallen leaves and my favorite Starbucks latte!

Also, fall makes comfort food sound so appealing.  Comfort food is not usually my go-to choice for eating.  Give me tacos or pasta any day!  Also, having a dairy allergy kind of limits a lot of those comfort food choices.   Sad, huh?  However, one of my favorite soups. . . a recipe from my sweet friend is easily adapted to make it dairy free and it still tastes delicious!

Also, it has bacon.

I mean, dairy free and bacon.

You don't even need to know what it is.  It has bacon in it.  That's enough.

This Corn Chowder is my favorite.  Food also brings great memories. 

My friend and I had our first kids 2 weeks apart.  It was the best thing.  We both decided to stay home with those cute babies of ours.  We joked that some day our kiddos would get married and talked about random craziness.  We also loved getting together for play dates. . . which are way fun when babies aren't old enough to fight with each other!  One day, she made me lunch with her dinner leftovers and it was amazing.  This soup. It provided dinner for her family and a sweet meal with a great friend. 

See great memories. 

This corn chowder is so great, because I can eat it.  The plain almond milk doesn't even change the flavor so the whole family can eat it.  This is a big deal when half your family can't eat dairy. 
 So, first things first, cook up some bacon pieces.  I won't tell if you double the bacon.  It'll be our little secret. 
 Take out some of the bacon and set it aside on a paper towel, so you can sprinkle with bacon before serving.  Add some chopped celery and onions into the bacon and all that beautiful bacon grease. 

  Add in the corn, dairy free butter, and broth.  Give it a little swirl and add the carrots and potatoes. Keep cooking for about 15 minutes.  While that's going, mix some water and flour together into a paste like consistency.  Add it to your almond milk and stir. Keep cooking for 3o minutes or until you are ready to feed your family.
 Kids make great helpers for this kind of meal.  Stirring is fun, I tell them.  Also, don't sweatshirts scream comfort food? 
 Cheese and bacon make great toppers.  There's no such thing as too much bacon. 
Ready to add this to your meal plan?   Also, if you really aren't all about dairy free and you can handle dairy (so jealous right now), just substitute non dairy for their real, milk and cream alternatives.  Easy Peazy!

Also, this recipe is not gluten free. . . since you are adding flour into the milk as a thickener.

Corn Chowder
adapted from allrecipes.com

Ingredients:
1 package of bacon (or two. . . I won't tell)
2 celery sticks, chopped
1 large onion, diced
2 TBSP dairy free butter
salt & pepper to taste
1 can creamed corn
1 can whole kernel corn (I used fresh corn that I froze over the summer)
4 cups chicken broth
2 cups plain almond milk
6 cups small potatoes, cubed
2 carrots, chopped
2 TBS flour

Directions:
Fry bacon in pan until almost done.  Take some out for sprinkling on top.
Add onions and celery and saute until lightly browned.   Add corn, butter, and broth.
Add carrots and potatoes.  Continue cooking for about 15 minutes.  Mix flour and a little bit of water together to make a paste.  Add milk and flour paste into the soup.  If your soup is still not even thick enough, feel free to make some more paste and add it t little by little to your soup until you get the desired thickness. 

Keep simmering for about 30 minutes or until you are ready to serve.  Top with cheese and bacon.

Happy Cooking! 

LinkWithin

Related Posts Plugin for WordPress, Blogger...