Friday, January 29, 2010

Brownie Chunk Cookies

I love cookies. I love brownies. Mmm. . . . why not combine the two? I found this recipe on a blog sometime ago and have always had the idea stored in the back of my head until 2 weeks ago, when I actually had some brownie chunks to use. Then, I couldn't find it anywhere! (That's the way it works, right?) I spent what seemed like hours searching all the blogs I read and it was as if the recipe had been imagined. I just couldn't believe that I had imagined it, so I got online to cookiemadness.net and emailed Anna personally (she was super nice about it!), and she knew exactly which recipe I was talking about. . . however, she hadn't made them and couldn't find her link to the recipe either. She did mention that she had seen it in BonAppetit and so I googled it. . . and within 30 seconds, I had my recipe. Wahoo! I was so excited and couldn't wait to begin baking!

Here are my notes on the recipe:
:: I didn't make my own brownies. . . I used the brownie bites left over from a MOPS meeting.
:: I didn't add any nuts.
:: The comments on this recipe said the brownie recipe used was amazing. . . some day, I will try it.
:: Jon said that they were the closest thing to plain old chocolate chip cookies he had had in a long time (try a year. . . yes, it has officially been a year of no baking Nestle Toll House Chocolate Chip Cookies. I am going to plan on baking him some, soon!)
:: These were really good. I hope to make them again sometime, however, there are so many new recipes to try, it might be awhile, and brownies don't usually last that long in our house. . . especially those fresh out of the oven!
:: Please try this recipe and let me know your thoughts. . . I would love to hear them!

Here's the recipe from BonAppetit:

2 1/2 cups all purpose flour
1 teaspoon baking soda
1/4 teaspoon fine sea salt
1 cup (2 sticks) unsalted butter, room temperature
1 cup (packed) golden brown sugar
1/2 cup sugar
2 large eggs
1 teaspoon vanilla extract
1 cup walnuts, broken into 1/2-inch pieces
1/2 recipe (1/2 sheet) chilled Old-Fashioned Brownies, cut into 1/2-inch cubes (generous 4 cups)
Nonstick vegetable oil spray

Preheat oven to 350°F. Line 2 large rimmed baking sheets with parchment. Whisk first 3 ingredients in medium bowl. Beat butter and both sugars in large bowl until smooth. Beat in eggs and vanilla. Stir in dry ingredients, then walnuts. Gently fold in brownie cubes (brownies may crumble).
Spray 1/4- to 1/3-cup ice cream scoop with nonstick spray. Scoop batter; drop onto prepared sheets, spacing about 2 inches apart and spraying scoop with nonstick spray as needed. Using moist fingertips, flatten mounds to 1-inch thickness.
Bake cookies, 1 sheet at a time, until just golden, 18 to 20 minutes. Cool cookies on baking sheets.

Happy Baking!

Thursday, January 28, 2010

My favorite dessert of all time!

I thought it was about time I shared with you my favorite dessert to make. . . I am not kidding. . . it truly is my favorite! I could eat it and eat it and eat it! It is so simple and inexpensive to make, I wonder why I don't make it more. . . oh wait . . . I can't eat it all! So, today, I present to you


(drum roll please?)


the Eclair Torte . . .

Doesn't it look delicious? Like, as you are staring at it you want to go grab your fork and take a bite. . . and then you remember that it is just a picture posted on a random blog showing up on your computer screen. It really is good, trust me!

I found this recipe in my mom's Quick Cooking Annual Edition (1999) and have been making it since. . . So, over 10 years now . . . and the recipe is still one of my favorites (Mom, if you are reading this. . . you really need to comment on how delicious it really is).

Here's what it looks like in the 13x9inch pan. . . scrumptious, huh?

So, here's the recipe. . . go make it . . . now! (or have some friends over so you can gab and eat. . . it's not that bad for you. . . really!)

1 cup water1/2 cup butter (do not substitute)
1/4 tsp. salt
1 cup flour
4 eggs
1 (8oz) pkg. cream cheese, softened
2 (3.4z) pkg. instant vanilla pudding
3 cups milk, cold
1 (12oz) carton whipped topping, thawed
chocolate syrup

In a saucepan over medium heat, bring water, butter and salt to a boil. Add the flour and stir until until a smooth ball forms. Remove from the heat and let stand for 5 minutes. Add eggs, one at a time, beating after each one. Beat until smooth. Spread into a greased 13x9 baking dish. Bake in a 400 degree oven for 30 to 35 minutes or until puffed and golden. Cool completely. (You may remove the puff and place it on a serving platter). In a bowl, beat the cream cheese, pudding mix and milk until smooth. Spread over the puff and refrigerate for 20 minutes. Spread the thawed whipped topping over the pudding mix and refrigerate. Drizzle with the chocolate syrup just before serving.

I will note this though, It is best eaten on the day of. . . still pretty good the second day, but the absolute best the day of.

Sunday, January 24, 2010

think happy thoughts

The joys of now being a homeowner are taking effect. My parents came up yesterday to help Jon fix the fence (for which we are greatly appreciated. . . it was leaning at such an angle that the neighbors dog kept coming over to visit) and then the heater broke. I am sure that it was broken, but now it is not on and it's the weekend and we are cold. I am trying to have a great attitude about this, so I am drinking lots of hot tea and sitting in my warm bed surrounded by my warm covers blogging. It is cold, but peaceful. I am, however, very thankful that despite how cold it is, we live in "Cloudy" California and the low is nowhere near most people's low around the country. Not to mention, my husband, son and I all slept in together to stay VERY warm. It is a fun adventure!
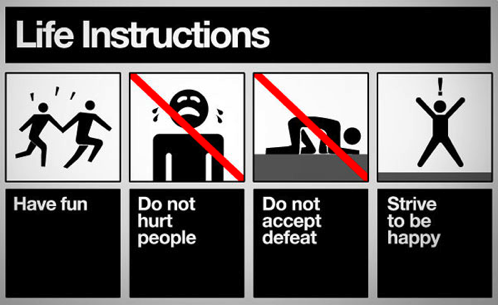
I thought this picture was appropriate as I am sitting here writing. . . it was kind of funny! I hope that you all enjoy it too.

:: I have a new book that I can't wait to start some projects with. It's by Amy Butler and it has project cards to work on. So many ideas are flowing through my brain.

:: I am excited for MOPS this week! It is so nice to get out and just be with other young moms and be refreshed.

:: My friend Steph and I are working on the details for our Bible Study's annual Valentine's tea. It is filling my brain with all sorts of fun ideas. I love the fun of random holidays. I also can't wait for Valentine dark chocolate M&M's to go on sale so I can restock my chocolate jar. mmmm.

:: I am really excited to make these. . . but with my new browned butter recipe. mmmm. . . I will have to share the recipe soon.

:: My mom let me use here new stamp set yesterday. . . I am so excited to make some fun Valentines for my friends.

:: This week, I can't wait to make these cookies. . . I have been craving them and I have oranges from Steph's backyard that are so very delicious! I also want to make some muffins similar to the cobblestone muffins at Panera. I have fallen in love!

:: I also have some sewing to do this week. I am hoping to get something done for my friend Marissa (it's her second!) and some rattles for some other small gifts.

I think this week is going to be busy. Hopefully the homeowners insurance people will come out quickly and rescue us from the cold and I can get some cleaning done as well as some crafting, sewing, and baking. I had better go and get the kiddo up. . . nap time and quiet time are almost over.
I hope to get on several times with some new posts. My camera is full of things to share with you, including a couple recipes. Have a great week!

"A cheerful heart is good medicine, but a crushed spirit dries up the
bones." ~ Proverbs 17:22

Wednesday, January 20, 2010

Card making time. . .

I have been in the mood to do some stamping this week and I had the perfect reasons to get them out. Oh, I had so much fun!
This is a basic card that I fell in love with. I just used pink paper, my Pixie Pink SU ink pad and Chocolate Chip SU inkpad to do the stamps. This set is a 2 step stamping set called . . . wait a sec. . . I don't know. . . I borrowed it from my mom and she didn't put the sticker on it. OOPS! Oh well. But, is a Stampin' Up set. I used the giggle stamp from Warm Words (also SU). I topped it off by using my small SU corner punch on all 4 corners.
This set uses the same layout as the first card. This time, I used my SU ink pad, Garden Green and some SU coordinating colors to stamp my snow flakes. The stamp set is Snow Flurries (SU) and the word "Sparkle" also comes from Warm Words.

This baby shower card was so much fun to make. I used the stamp set Oh, My Word (SU) with some of their designer series paper that I got many years ago. I used Bliss Blue and Gable Green card stock (also SU) and a new Martha Stewart Punch that I got at Michael's before Christmas (it was love at first site!). I added 2 button brads to the wheels for an added touch and tied a ribbon around it.

This one is the same card but different colors because I couldn't very well give my other friend a boy card when she is expecting Baby Girl Hope, now could I? These colors are SU Barely Banana and Pretty in Pink. The gross grain ribbon is actually SU, also.
I have to admit that typing this it seems as though I am a Stampin' Up fan. That is indeed true. . . so true infact, I used to be a demonstrator. Their products are fantabulous, and the results are awesome! I am however branching out. . . I have recently fallen in love with Martha Stewart products . . . and combined with a 40 percent off coupon. . . it makes my hobby so much cheaper. I do feel a bit like a betrayer to SU, but I really like the quality and designs of Martha Stewart's craft line.


Tuesday, January 19, 2010

My first baby gift of the year. . .

Saturday marked the first baby shower of the twenty-ten. So, I must unveil my first sewing of the year. I have to confess that it felt good to sew. The past two months have been fairly chaotic and it was so nice to sit in my own space and sew during Ethan's nap time. And, when I was done. . . I didn't have to put my machine away so we could eat. . . it just stayed right where I had it set up. Let me just say. . . it was so NICE! So, in honor of my sewing space I must show you what I've been working on. It was my friend Lindsay's shower, so I had to make her a diaper pouch. . . she would need it in the church nursery (the workers LOVE them!), a taggie, two chenille burpies, and a matching rattle. It was also really nice to use some girly colors. . . for a change. My next set of baby stuff will be boy. . . fun stuff!

Sunday, January 17, 2010

Time for tea. . .

My good friend Stephanie gave me a tea holder thingy for my birthday. I absolutely love it. . . I can carry tea with me everywhere. My sister is also a tea lover, and so I finally got the time to create her one. I didn't use the same style as the one Steph gave me. . . I wanted to try and modify it.
This one if far from perfect, but I sent it to her anyways, and she LOVED it! It was a really fun thing just to send a cheap gift in the mail (my sister lives in Wyoming) just to surprise her.
These ones worked great for fitting the TAZO teas in. . . which was my goal. Ohh, and these could also fit those new VIA instant coffee pouches from Starbucks. . . another great gift idea to keep in my brain!

Friday, January 15, 2010

Easy Peasy Lemon Squeezy

Our new home has a lemon tree. . . and they are fresh for the picking! Yeah. My first harvest of fruit and I have only lived here 3 weeks! My sister, Karissa, gave me a phenomenal idea when she called asking for a lemon curd recipe that didn't require a double broiler. It didn't take me long and I found on allrecipes.com a great MICROWAVE recipe. Let's just say that this lemon curd turned out great! I will definately be making this again! It was very scrumptious. I need to make some scones to go with it. . . that would be so delicious and . . . a great excuse to start baking.

Here's the recipe:

Microwave Lemon Curd
1 cup white sugar
3 eggs
1 cup fresh lemon juice
3 lemons, zested
1/2 cup unsalted butter, melted
In a microwave-safe bowl, whisk together the sugar and eggs until smooth. Stir in lemon juice, lemon zest and butter. Cook in the microwave for one minute intervals, stirring after each minute until the mixture is thick enough to coat the back of a metal spoon. Remove from the microwave, and pour into small sterile jars. Store for up to three weeks in the refrigerator.


Tuesday, January 12, 2010

just a note. . .

WOW! It seems like ages since I have gotten on just to post anything. I am going through withddrawls. . . really, I am. I love getting on here and sharing my creative side and thoughtful side with those of you who actually take the time to read my blog (thank you to those of you that do!).

I have so many things to share with you (to be posted soon, I promise!). I have been busy in the kitchen, in the office (a.k.a my own sewing/crafting space), and in the house. There are still boxes to be unpacked and I am so distracted by my sewing machine and the ripe lemons that are calling my name (I need to do something with them!).

I must share that this week, I actually feel like myself again. Routine has once again been established in our new house, including a new sleeping routine for Ethan (sadly, we traded our bi-daily nap ritual for one long afternoon nap). This in itself has taken some adjustments in the way I do my chores and spend my free-time (yes, I do try to have it. . . and if I keep ignoring the boxes in the garage, I will have more than I should LOL!). I can't believe how important routine is to me. . . it makes me feel organized!

Well, I am going to stop writing for now. I hope to be on soon with pictures of the things I am working on. But in the meantime, please keep the people in Haiti in your prayers. . . there was a devasting earthquake there today and the people there are very close to our church family. Haiti is a very economically poor country and our church just built a brand new orphanage there this past summer. There is a lot of devastation there, so please keep the people in your prayers.

Thanks so much!

Wednesday, January 06, 2010

Better Late than Never . . .

Christmas came and went so quickly, as it does each year. This year seemed to be a whirlwind in the Klassen household. We moved into our new home 3 days before Christmas and spent every waking moment it seemed, unpacking boxes. So, I am now, 2 weeks later, catching up on my blogging. Here are a few of the things that I accomplished for Christmas, although it is not all. I can't believe I forgot to take pictures of all my sewing projects. I made potholders with matching dishtowels, t-shirts with appliqued first initial, fabric memory cards and coffee sleeves. I have already blogged this similar to them, so I will let you do the work of searching for the items.
Now for the items on the collage:

1. Bath Salts and Sugar Scrubs - Last September, our first craft of the MOPS season was bath salts. I had so much fun making them that it became an instant gift idea. As a result the gals in the family received these nice smelling treats.

Directions:
- Bath salts - combine 1 cup of each - coarse sea salt, dead sea salt, Epsom salt, and or baking soda. Add a few drops of selected soap scents (found at Michael's). Put in cute jar to use or give away.
- Bath scrub - Combine 1 cup of sugar with enough olive oil to get desired consistency. Add a tbsp of honey.

2. Candied Mixed Nuts
I found this recipe online. . . it was great! I used a bag of unsalted mixed nuts from Trader Joe's and it turned out delicious!

Walt Disney World's Glazed Almonds

1/3 cup butter
2 egg whites
salt
1 cup sugar
1 (16 ounce) package almonds
4 teaspoons cinnamon

Directions
Place butter on 15- x 10-inch jellyroll pan and heat in 325F oven until butter melts, about 7 minutes.
Meanwhile, beat egg whites with dash of salt until frothy, then gradually add sugar, beating to stiff peaks. Gently fold in almonds and cinnamon.
Pour almond mixture into jellyroll pan and stir, coating with butter.
Bake, stirring every 10 minutes, until almonds are crisp, about 40 minutes.
Serve warm or at room temperature.

3. Cranberry Hootiecreeks in a jar.
I made a batch of these for my grandma. My jar was a tad too small, so I stuck the white chocolate chips in a bag and tied them to the lid. I thought it looked great! In fact, I just made a batch of these and sent them to work with Jon yesterday. . . rave reviews. There is something amazing about this cookie.

4. Peanut Butter Crispie Balls
I was introduced to these last year just after having Ethan. After 3 months on an incredibly low carb diet, these were such a desirable treat. My husband, also a huge PB lover, requested these for Christmas last year and are now on the annual list of treats to make each Winter. They are a no-bake treat is great to make ahead and then freeze. When I need a quick dessert, I know I can make these ahead of time and usually just make half a batch, which is still quite a lot.

2 c. peanut butter
1/2 c. butter
1 lb. confectioners' sugar
3 c. Rice Krispies
Dipping chocolate (I use chocolate bark)

Combine peanut butter, butter and confectioners sugar in large bowl. Blend well. Add rice cereal. Form into 3/4 inch balls. Refrigerate for about 2 hours. Dip into melted chocolate. Makes about 75 or more balls. Great for holiday gifts.

I hope that you all had an incredibly happy Christmas! I know that regardless of the chaos of mine, we had a great time celebrating the birth of our Savior and spending time with family, and eating LOTS of delicious food!
Posted by Picasa

LinkWithin

Related Posts Plugin for WordPress, Blogger...