Thursday, June 30, 2011

4th of July goodness

I am in bed. Sick. The Vacation Bible School Virus hit Ethan last week and now me (hopefully the other two don't get it!). But, here's a quick post for something fun and kid friendly for the 4th of July. . . plus it is super easy!


Patriotic Jell-o cups

Ingredients:
clear plastic cups
Berry Blue jello
cool whip
strawberries

Directions:
Make Jell-o according to package directions. Pour into cups about 1/3 of the way full. Put in refrigerator for at least 4 hours.
Add a heaping scoop of cool whip, smooth out. Add sliced strawberries to the top of each cup. Put a dollop of cool whip on top. Eat. . . Enjoy. . . Celebrate the 4th of July.

Thursday, June 23, 2011

Plum Goodness

mmmm. . . remember that bowl of plums I posted yesterday? hmmm. . . it's been reduced to about half now. The result. . . scrum-didli-umptious! I may have mentioned that we are in the middle of "living out of the cupboards" right now and so going to the store to buy some pie crust was out of the question (it's not a need, like milk), and although I had all the ingredients to make my own pie crust, It VBS week and I am plum pooped! So, I went with an easier alternative. . . double crusted plum crisp (yes, there is that cinnamony, oatmeally, crumbly mixture on the top and bottom! Yes. . . it's good. I promise it's good. I may make this same recipe using other fruits this summer, i think would taste great with peaches, pluots, and apples. hmmmm. . . my mouth is watering.
Double Crusted Plum Crisp

Ingredients:

Crisp:

1 1/3 cups all-purpose flour
1 cup rolled oats
3/4 cup packed brown sugar
1 teaspoon cinnamon
1/2 teaspoon salt
10 tablespoons unsalted butter, melted

Plum Filling:

4 cups thinly sliced plums, pit removed
1/2 cup granulated sugar
1 tablespoon cornstarch
Juice of 1 lemon
1 teaspoon vanilla extract

Directions:

:: Preheat the oven to 350 degrees. Spray an 8 by 8 baking dish with cooking spray. Set aside.

:: To make the crisp, mix the flour, oats, brown sugar, cinnamon, and salt together in a medium bowl. Stir in the melted butter and mix until mixture is moist. Press half of the crisp topping into the prepared baking dish.

:: For the plum filling, put the plums, sugar, cornstarch, lemon juice, and vanilla in a large bowl. Stir until plums are well coated.

:: Spread the plums evenly over the bottom layer of the crisp. Sprinkle the remaining crisp over the plums. Gently pat the crisp topping down.

:: Bake in the middle of the oven for 45 minutes, or until the crisp is golden and the fruit is bubbling. Let cool for 20 minutes before serving.

* I added some Pampered Chef Cinnamon sprinkles over the top of my crisp and then poured some over the ice cream when I served it.


Wednesday, June 22, 2011


Looks good, huh? We are in the midst of 107 degree weather. . . ugh! (I may have mentioned that I haven't had much motivation lately. . . the incredible temps, doesn't help!). Anyways, my wonderful husband braved the heat late last night and picked a bowl of them. Last year our tree produced about 2 plums, so this year we are quite suprised that we have had so many plums. Not to mention, they taste wonderful! My husband showed one of his co-workers (he happens to be very plant savy), and they came to the conclusion that this particular variety is best for plum pies. I'm not in the mood to make pie. . . so I found something else that looks incredibly delicious. . . hopefully I find the motivation to make it tonight!
Posted by Picasa

Tuesday, June 21, 2011


Vacation Bible School is this week. That means early mornings, hot, tired kids and mommy, and no motivation to do anything. Plus, my camera has gone awol. . . have no idea where it is and don't know when the new one is coming (thank goodness for the iphone). So, I am spending my summer afternoon (btw, it's 105 degrees out!) sitting on my butt with the new FNM that came in the mail (yay!). Hopefully motivation will come back. . . there are dishes to be done and sewing to be had!
Posted by Picasa

Monday, June 13, 2011

Bunting Card

I love bunting. I have seen a few cards out there in the blog world that were made of mini bunting, so I finally got around to making my own card. It was so easy! I will definitely be making more of these in the near future. This card gave a great purpose to my drawer of paper scraps (I just can't throw away my scraps. . . it's a problem, I know).

Directions:
:: Pick 2 or more pieces of coordinating scrapbook paper. Fold over at about 1 1/2 inches.
:: Cut triangles from the fold.
:: Use your choice of string and place inside the flag at the fold. Use double stick tape to seal shut. Place bunting on card where ever you want it.

Ta-da! Super easy!

Happy Crafting!!!!


Monday, June 06, 2011

childhood memories

My grandparents had the most amazing garden growing up. It was HUGE! I remember when my grandma would pickle cucumbers, make chili sauce, and pickle the beets. I remember eating peas off the vine. . . it was the only way I liked them. Everything tasted so good fresh out the garden. I can't wait to build my raised beds so that I can create some of those memories in my children. Last year's garden didn't go so great and this year, I just haven't had the time (I wonder why?).
One of my favorite things growing up was Strawberry Rhubarb pie. I probably haven't had it in years and Jon had NEVER had it, so I thought it was time to try, especially since strawberries are HUGE right now. I had my recipe picked out, but hadn't looked at it in awhile, sent Jon to the store to get Rhubarb. He picked up 3 stalks. . . which wasn't enough for the whole pie. (I can't blame him. . . I wasn't sure how much I needed or how big his stalks were going to be). So, I went a different route:
Don't they look yummy? They were. Jon was impressed (he had never had rhubarb before). I modified this recipe, cutting the recipe into a third of what it was supposed to be, which was still a lot of filling. I used 2 sheets of Pilbury refrigerated pie crust and my newest Pampered Chef toy, the Cut and Seal (Thanks Karissa!). I used an egg wash to seal the two sheets of dough before I cut it out with my new toy, then gave it an egg wash over the top and sprinkled my cinnamon sprinkle (also Pampered Chef) over the top of it. It ended up being the perfect dessert for 2 nights for Jon and I. I will definitely make these again!


Friday, June 03, 2011

Favorites: Pampered Chef Style

I have a kitchen gadget fetish. I get my gadgets from Williams Sonoma, Crate and Barrel, Sur La Table, and Pampered Chef. I am actually having a Pampered Chef Party on Friday, June 10th. I have been spending some time getting very distracted and browsing the catalog wondering what I am going to get to add to my collection. So, I thought I would show you my top ten favorite Pampered Chef gadgets/products that I use on a regular basis. So here goes it:

1. Easy Accent Decorator - I love this! I use it for decorating my cupcakes, making cream puffs, deviled eggs. . . I use it a lot. In fact, I use it way more than I ever thought I would.
2. I always buy the Season's Best cookbook at Pampered Chef parties. . . they are only a dollar! Seriously! They have some fantastic recipes inside, too! In fact, the very first recipe I posted on this blog came from one of them.. . it was delicious!!!!!!!

3. Sweet Sprinkles . . . I have mentioned these a lot in my posts. They are the perfect accent to so many of my muffins, scones, and pies. They just came out with an apple one. . . definitely on my shopping list!
4. Mini Spatula. . . this is by far one of the most used things in my utensil drawer. It is perfect for digging into a dish of brownies or rice krispie treats. Sometimes, I wish I had 2.
5. Large serving spatula. This is my lasagna getter out go to utensil. Did that make sense? I hope so. It has slightly sharp (not like a knife sharp, but sharp enough to cut through pasta or cake) edges so that you can cut right into your lasagna (or anything for that matter) and put a very pretty piece of cake or lasagna onto someones plate without looking like it oozed out all over the place. It is also really easy to clean up melted cheese on (some of my "pretty" spatulas don't).
6. Batter Bowl. I have a large one and a small one. I love that they come with a lid. You can even bake with them, although I haven't tried that (If I need to make a Barbie cake, you can bet I am going to use this bowl!). I use it for making my pancake batter or a quick dish of brownies. It's perfect!
7. Quick-cut paring knife. I love these. When I taught, these went into my lunch bag. When I went on a major road trip with gestational diabetes a few years ago, one came with me. I use them for apples, but they can be used for just about anything. They are super cheap, like 1 to 2 dollars a piece. My favorite part. . . if I lose them, it's okay. . . they are easy to replace.
8. Can Opener. I am weird about can openers. I don't like the metal shards that tend so come off the cans and sometimes end up in your food. . . it just seems gross and icky. . and dangerous? This can opener just loosens the glue from the lid and pops it right off. . . no metal shards. . . no mess. . . it's great!

9. Spoonula. It's actually a Mix and Stir, but it is heavy duty and can withstand heat. I can not only use it to whip up a batch of brownies, but I can use it when I am making something on the stove top, because they can withstand high heat, which is great!

10. Slice and Serve. This is the greatest pie cutter/server ever! It can cut beautiful slices of pie as well as round cakes. I can't serve pie without it. . . it is simply the greatest invention ever!

If in you're in the area and want to come, feel free. Leave a comment, if you want info. If you want to order something you can go here to shop online. I highly reccommend Pampered Chef products, they are incredible, quality products perfect for your cooking and baking adventures.

Thursday, June 02, 2011

muffins. . . or cupcakes?

I really could have sworn that I blogged about this amazing recipe, but I guess I haven't. So if you are needing something to make for a brunch. . . or a weekend treat. . . or just to bake something, I highly recommend these beauties. This recipe really made me think. . . what is the difference between a muffin and a cupcake? Quite honestly, after making these, I wasn't sure. So, here's my theory. . . frosting. Cupcakes have frosting, muffins don't. Sometimes, muffins have a glaze, but that doesn't count. What do you think?

These are amazing. . . what recipe with chocolate and peanut butter isn't though? I really suggest you go and get your pad of paper and start making a grocery list right now. . . especially if you are out of peanut butter. . . you are going to need it. Dieting? weekend don't count, right?

Here are ten reasons why you should make muffins this weekend:
1. You worked hard this week and deserve a treat.
2. It's going to start getting hot and this cooler weather is a treat. Make something yummy before it is too hot to bake.
3. You might be able to give some friends as a surprise. . . it just might make their day.
4. Have a friend over for some coffee and muffins.
5. You are due any day and need something to kill the time. . . it just might get those contractions to 5 minutes apart (yes, Steph. . . this one is for you)
6. It's a great teacher appreciation gift. . . the school year is coming to a close . . . Bring on the Summer!
7. First day of summer breakfast treat. . . Bring on heat, swimming, and ice cream!
8. Your family probably would like to eat something other than cereal.
9. You're PMSing and are in need of something filled with chocolate
10. Peanut Butter and Chocolate. . . how can you not?

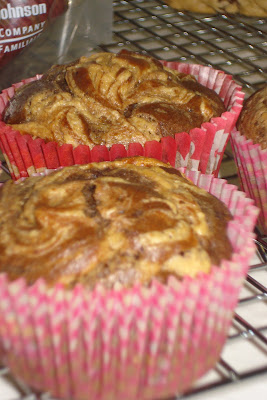
Chocolate Peanut Butter Swirl Muffins
source: Annie's Eats

Ingredients:
:: For the muffins ~
6 tbs unsalted butter, at room temperature
2/3 cup chocolate chips, divided
2 cups flour
2/3 cup sugar
1/3 cup baking cocoa
1 tbs baking powder
1/2 tsp baking soda
1/2 tsp salt
1 1/4 cup buttermilk*
1 large egg
2 tsp vanilla

:: For the swirl ~
1/3 cup creamy peanut butter
1 tbs unsalted butter
1/2 cup powdered sugar
1 tbs milk

Directions:
:: Preheat oven to 350 degrees.
:: Line muffins with liners.
:: Combine butter and 1/3 cup chocolate chips in microwave safe bowl. Heat for 20 seconds, stir, heat again until melted and combined. DON'T OVER HEAT. Set aside.
:: In mixing bowl, combine dry ingredients. Whisk to mix briefly.
:: In a liquid measuring cup, combine buttermilk, egg and vanilla. Whisk until combined.
:: Slowly add buttermilk mixture and mix on low speed. Then add melted chocolate mixture.
:: Stir in chocolate chips with spatula.
:: Divide batter between muffin cups. Don't fill more than 2/3 because these rise a lot.
:: Combine peanut butter and butter in a heatproof bowl. Microwave briefly until smooth. Whisk in powdered sugar and milk until smooth.
:: Drop a spoonful into each chocolate cup. Take a knife or skewer and swirl muffin.
:: Bake 20-22 minutes. Let cool for 10 minute before taking out of tin.
:: eat one. . . maybe another one. . . let me know what you did with the rest.


* I never buy buttermilk. I find it easier to just add a bit of vinegar to my milk (I use whole milk) and my muffins turn out fine.
** Remember that these are muffins and NOT cupcakes. . . don't over mix.

******************QUESTION????*****************

What is the difference between a muffin and a cupcake?

Did you make this recipe. . . what'd ya think?

Wednesday, June 01, 2011

Short weeks & Schedules

I seem to have gotten behind on my blogging. There is so much I need to do and so much I want to do. . . it's a battle each time I sit down to do something. Anyone else have this problem? This week is a short week in my house due to a 3 day weekend and the hubby's normal Friday's off. A nice short week, but so much to do in a short amount of time. A goal of mine is to have all the house work completed before the weekend starts because chances are, it won't get done and I want to have quality family time. . . so it has been kind of me-made rule that I get as much as I can get done during the week (which is a little bit harder now that I have two kids with two different schedules). I also don't like to go out every single day. . . I am a self-proclaimed home body (I also think my kids do better when we aren't so busy). Some weeks, the business is completely unavoidable unless I am intentional about not planning and/or just saying no. (By the way, saying no is really hard for me. . . really hard. It is something I am working hard on and my husband is keeping my VERY accountable).

Here's what a typical week looks like:

Sunday - church, naps, and Life Group
Monday - "weekend recovery day" I call it that because it usually takes me a day to clean up messes from that weekend. This includes the weekend's laundry and sometimes a mess in the kitchen. I also try to clean the laminate flooring during my small window when both kids are asleep.
Tuesday - Kitchen floors and bathrooms, start menu planning
Wednesday - Free Day. . . my goal is to not clean. . . usually my body needs a break.
Thursday/Friday. . . dust, vacuum, laundry, grocery shopping.

Thursday and Friday get lumped together because every other week my husband has Friday off . . .which is so nice. . . a huge blessing (thanks to the Air District helping to save the air).

During the week, I often get to throw in baking, play dates, zoo trips/tot time, library visits, etc.

I am hoping to do some blogging tomorrow during nap time. . . we'll see how it goes. If not, I'll definitely be back into the blog world next week with some projects to share.


LinkWithin

Related Posts Plugin for WordPress, Blogger...